
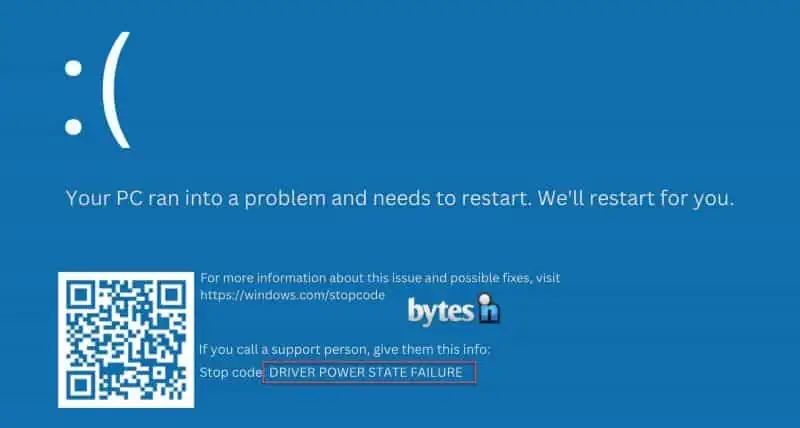
A BSOD, or Blue Screen of Death, is a Windows critical error that ends in freezing or restarting your PC. While most novice users have no idea why they get these ugly errors, you can fix most of them. Evidently, if the issue is hardware related, there’s little you can do but change the faulty component.
What is the “Driver Power State Failure” Error?
The “Driver Power State Failure” error usually crops up when a computer or device driver unexpectedly enters sleep mode while you’re actively using the device. Here’s how it typically happens: When Windows needs to use the device, it sends a “wake up” signal. If the device doesn’t react promptly or respond, Windows raises the red flag, noting a “driver_power_state_failure” error. There are two potential culprits for this issue. It might be the driver itself causing the error, or it could be related to the power settings.
How can you fix the “driver_power_state_failure” error?
The name “driver_power_state_failure” suggests that the primary issues leading to this error are tied to the drivers or the power settings. Given this vital information, we can start debugging and fixing the problem related to these factors.
Update your drivers
Before we get into any manual actions and debugging, we can use a driver updater software that scans your system and prompts you to update any old drivers. There are many driver tools on the internet; in our case, we will use Advanced Driver Updater.
- Launch Advanced Driver Updater
- Scan for potential obsolete drivers
- When finished and prompted, update the drivers that have newer versions
Remember that, as with any tool, you may have an old peripheral installed that isn’t in the updater’s database. In that case, you have to take manual action and look up the latest driver on their official site or partners.
Since this issue relates mostly to video or network cards, you can easily update the driver manually.
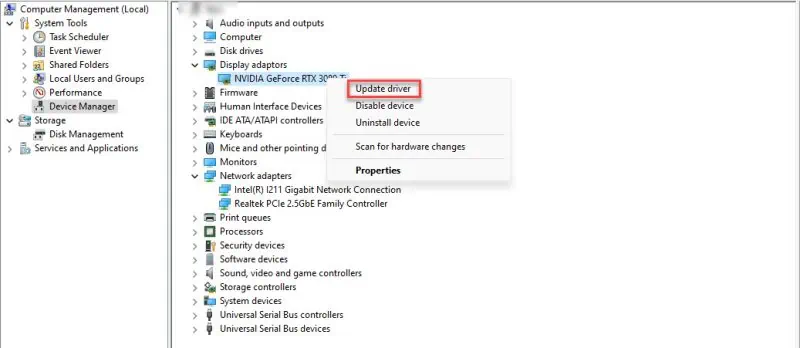
1. Navigate to Control Panel, Hardware and Sound and Device Manager.
2. Select your Display adapter or Network adapter.
3. Right click, select ‘Update Driver Software and Search automatically…’.
4. Reboot your computer and retest.
Alternatively, go to File Explorer, right-click on My PC, and press Manage. On the right side, press Device Manager or Performance > Device Manager (Windows 11). You’ll be able to see all your hardware and by clicking the respective categories, you can easily update your cards.
We also strongly recommend, before installing new drivers, doing a complete clean-up of the old drivers. Usually, there are older driver leftovers that tend to stick to your system even if you update your drivers. We do this by downloading DDU (Device Driver Uninstaller), which will automatically scan your system for your video card and will allow you to remove all of its file drivers from the system. We often resolved many video card issues using this software (including performance and stuttering).
If you have an Nvidia card, you can install GeForce Experience and let the software install the newest driver automatically. Alternatively, you can download the latest Nvidia driver and install it manually.
For AMD Radeon users, you can download the Radeon Adrenalin software and let it automatically scan and install the latest Radeon driver for your AMD card.
Change your power plan
Your computer may be currently running on a Balanced power plan or a Power saver plan. Most Windows installation default to the Balanced power plan, and in the case of laptops, some manufacturers decide to default to the Power saver plan for better battery efficiency. In this case, the system will enter a power-saving state when the computer is idle, and when it decides to push power to your devices, you get this ugly issue.
For desktop PCs, we always advise switching to the High Performance power plan by default since it provides more performance to your system at a consistent rate.
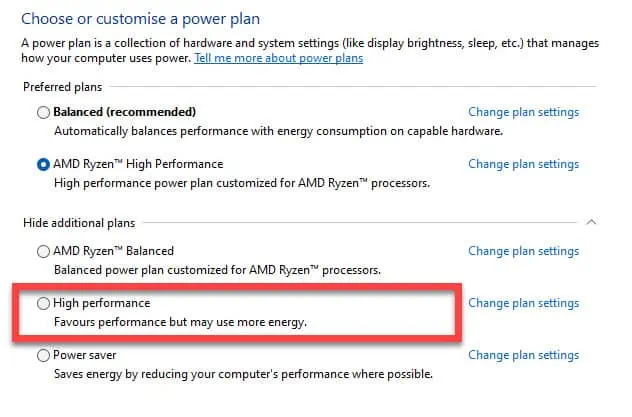
At this point, you should test if Windows still gives you a “driver_power_state_failure” error. If the issue is fixed, that’s great news. If you’re on a laptop, however, you should press Change plan settings and lower the value of Turn Off the display to save a bit more battery when you’re not working. You can also tweak the PCI Express > Link State Power Management and set it to Maximum performance. (in Change advanced power settings).
Turn off Fast Startup
Fast Startup is a standard setting in virtually every computer that operates on the Windows 10/11 platform. Its purpose is to streamline your computer’s startup process, making it more efficient and swift. In the same way, it enhances your computer’s ability to bounce back from hibernation mode with faster speeds. However, this function, despite its benefits, carries a potential risk. There could be instances where it might interfere with the smooth running of Windows, possibly leading to a situation where the operating system doesn’t start up as expected or throws a “driver_power_state_failure” error.
How to disable Fast Startup
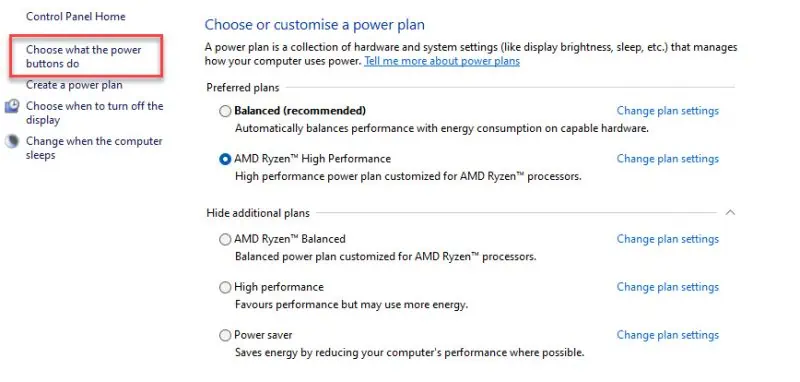
1. Go to Control Panel > Power Options
2. On the left side, press Choose what the power buttons do
3. Toggle off Turn on fast start-up (recommended)
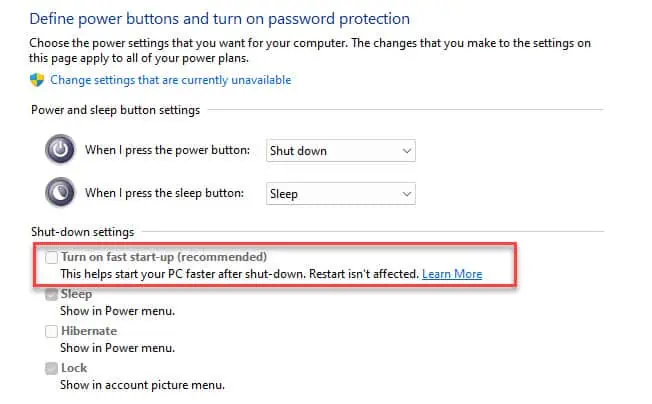
If the option is greyed out as above, you must click the “Change settings that are currently unavailable” link. (above that window).
Uninstall recent software
Have you just installed a new software on your computer? If so, this could be the underlying cause of the blue screen error ‘DRIVER_POWER_STATE_FAILURE.’ This error might be due to the newly installed application not being fully compatible with the existing components and configuration of your computer system. Another scenario could be that your installed software is somehow compromised – it may be damaged or corrupt. In such cases, the new application might not work as it should, and this could trigger the dreaded blue screen error.
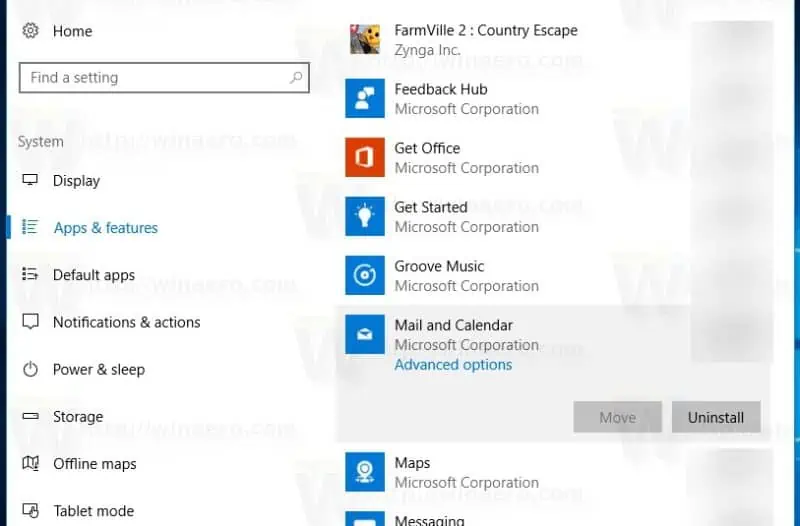
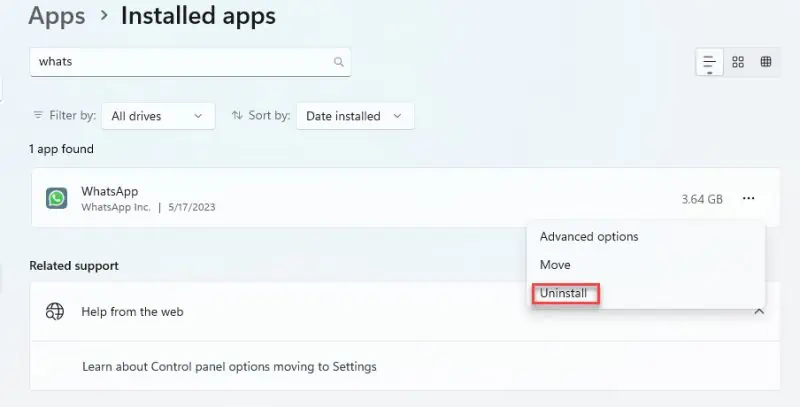
Uninstalling a software is pretty easy, right-click on your Start button and choose Apps & features or Installed Apps (Windows 11). Alternatively, the WIN + X key combination can bring up the menu.
Once you click the link, you’ll see a list with all your installed applications, each having a Modify and Uninstall link. If you’re on Windows 11, just click the 3 dots at the right of the application, and choose Uninstall.
Repair system corrupted files
A significant reason behind the appearance of blue screen errors is the corruption of system files. Fortunately, a solution to handle this issue is the System File Checker, often abbreviated as SFC. This is a powerful tool that you can conveniently use to fix these files. This utility performs a thorough scan of your system, identifying all the files present. If it encounters corrupt files during this scan, it replaces them with their original, untouched versions. It’s an effective way of restoring stability to your system and resolving any blue screen errors you might be experiencing.
How to use SFC scan
- Using the search in Windows, look for Command Prompt
- Right-click on Command Prompt and choose Run as administrator
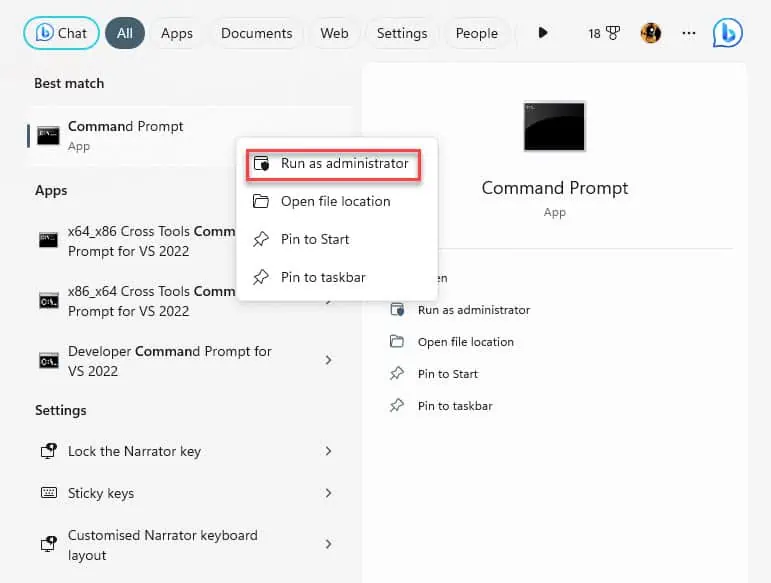
3. In Command Prompt, you need to write the following command sfc /scannow

The SFC utility will scan and fix corrupted files, if any are found.
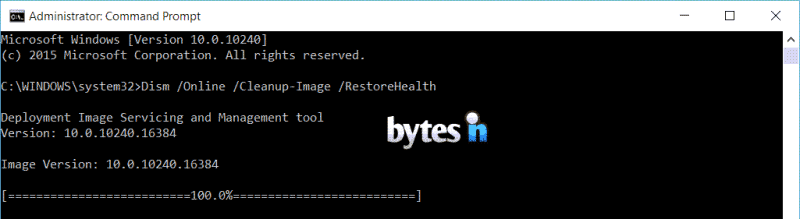
Use DISM to repair Windows
Should the System File Checker (SFC) command not resolve your PC issues, it’s time to move on to your next troubleshooting strategy. The next tool in your arsenal is DISM, which stands for Deployment Image Servicing and Management. Considered a crucial remedy in the world of troubleshooting, DISM is often seen as one of the final measures to take before you might need to resort to a more drastic course of action, like undertaking a repair installation or, in a more extreme scenario, performing a total reinstall of your Windows operating system. So, if the SFC command hasn’t found a solution, DISM might be the answer.
Once again, we open Command Prompt by running as Administrator.
Type this command and press enter: DISM.exe /Online /Cleanup-image /Restorehealth
After both commands, wait for the process to finish and restart your computer. Hopefully, these troubleshooting methods manage to fix your driver_power_state_failure error making you BSOD free.


")


