
So you’ve got a Windows 10 operating system and you are happy with it overall, but you wish it looked like a previous version of Windows you had. You might just be nostalgic for the past or you prefer the navigation system of a previous version.
No matter what your situation is, you will be glad to know that there are ways to change the look of Windows 10. In this article, you will be shown how to make your Windows 10 look like Windows 7 or Windows XP.
How to Change the Look of Your Windows 10 to a Windows XP or 7
Download and Install Open Shell
Classic Shell was a longtime favorite app used for replacing the Start menu of Windows operating systems. Due to its numerous customization options and ease of use, it was also used to make any version of Windows look like an older one.
This made it one of the best replacement apps for windows. Sadly, as in late 2017, the app was no longer in active development. Thankfully, a group of volunteers develops and maintains a successor which is called Open Shell. Most of the tweaks used in the article will require Open Shell, so install it before reading any further.
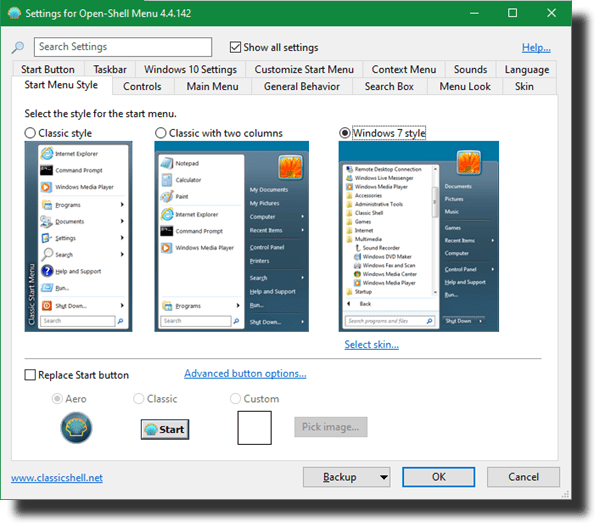
Once the app has been installed, search for it by typing “open shell” in your start menu and select Open-Shell Menu Settings. Make sure to check the Show all settings box in order to be able to see all the available preferences.
How to make Windows 10 look like Windows 7
Microsoft stopped supporting the Windows 7 from January 2020. While this does not mean that you cannot still use a Windows 7 operating system, Microsoft will no longer push out any updates for Windows 7, and it might be easier to get hacked and not be able to use some file types later on.
This marks the end in the life of this cherished version of Windows. Instead of clinging desperately to a dying version of the operating system, here is how you can revive the look of Windows 7 on your Windows 10 system.
Restoring the Windows 7 Start Menu
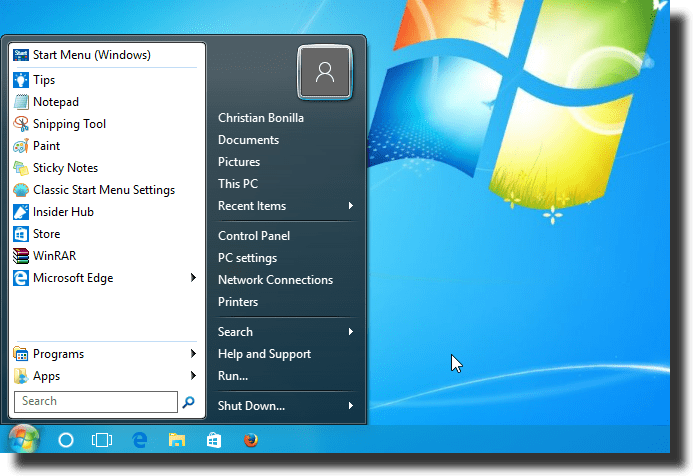
Head to the Start Menu Style tab of Open Shell and select the Windows 7 option. Below this, click on the Select Skin text that will appear. In the Skin pop up selection box, choose Windows Aero.

Now your Start menu will be recreated to how the Windows 7 Start menu looked and felt. You can also edit the Skin options to your tastes and preferences.
Getting a Windows 7 Style Taskbar
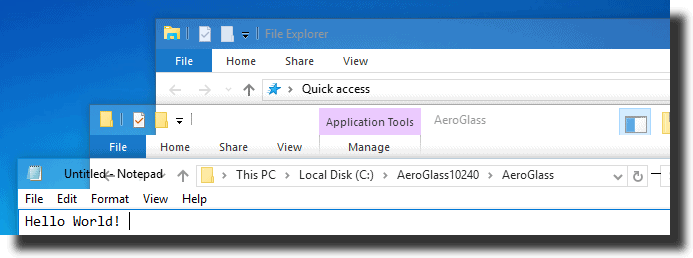
Go to the Taskbar tab of Open Shell and check the Customize Taskbar box, this allows you to change the customization options. Even though Open Shell does not have a systematic Windows 7 clone for the taskbar, the Glass option there bears a resemblance to it.
You can also adjust the color and opacity of this as you deem fit. Windows 7 enthusiasts will be able to notice that this theme does not impeccably recreate the taskbar. One point, in particular, is that it does not show the “glass panel” on all open apps
If you are not particularly happy with this, you can instead take a look at StartIsBack. It is also a Start menu replacement app like Open Shell and it offers a Windows 7 taskbar style, which also comes along with a built-in Windows 7 Start button.
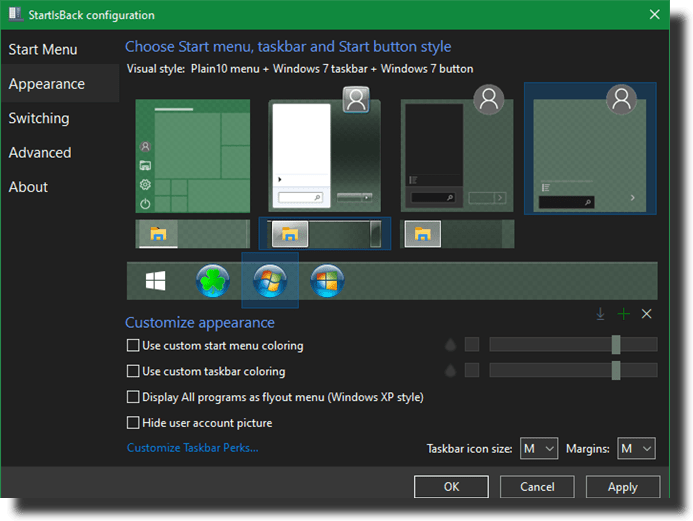
You will be able to try and download StartIsBack for free, but you have to pay $3.99 to get the full version. This price is worth it if you are trying to recreate the Windows 7 as thoroughly as possible on the Windows 10.
Adding a Windows 7 Start Button
If you decide not to use StartIsBack as cited above, head over to this Classic Shell forum post so as to download images of the Windows 7 Start button for Open-Shell. As soon as it is downloaded, extract the ZIP file and you should see various sizes of the Start button inside, which are convenient depending on the size of your taskbar.
Head back to the Start Menu Style page of Open-Shell and enable the Replace Start button option then pick Custom. Click on the Pick Image button and then browse to the location of the just extracted images from the forum post. Select the right size for your taskbar and click on OK on the options page.
If adjustments need to be made, go to the Start Button tab on Open-Shell. Then adjust the size, alignment, and a variety of options to your taste.
Setting up the Windows Aero Glass on Windows 10
Windows Aero Glass was a big aspect of the allure of Windows 7, but it is not a part of Windows 10. Even though it was one of the most requested from Windows Insider members, it was not added to the Windows 10 after Microsoft decided to remove it in Windows 8.
Setting up Windows Aero Glass brings back the good vibes from the Windows 7 era. Until Microsoft brings it back, you can use third-party tools to bring the theme to your system.
Glass 2K
The first tool is Glass 2K and it is available at the developer’s website. As soon as you download the app all you need to do is run it, it does not require any installation. Please note that Glass 2K does not state anywhere that it is compatible with Windows 10, but it works with 32- and 64-bit systems.
Once you run the file, you should see a settings box and options to load the tool as Windows 10 starts. Select the transparency settings for the individual windows, then add the Aero-like theme by clicking on the Save button.

You should also disable Transparency Popup as this might hinder your normal Windows right-click context menu.
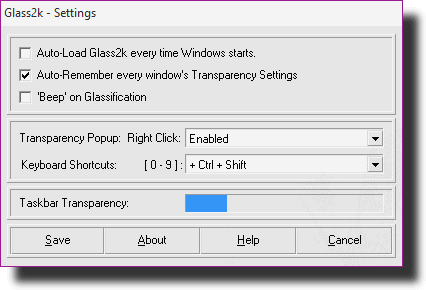
This now gives you control over the transparency of various elements of your computer. For example, open the Start menu and hit the Ctrl + Shift keys and any number from 0 – 9 so as to adjust the transparency level. Also, you can modify the Taskbar Transparency by dragging the matching blue bar.
Aero Glass for Windows 8
To get a more comprehensive Aero look get the Aero Glass for Windows 8 tool. It brings the color and transparency options that you would anticipate with the classic Aero of Windows 7 and Vista.
To run it with Windows 10, download the latest version, and being customizing it.
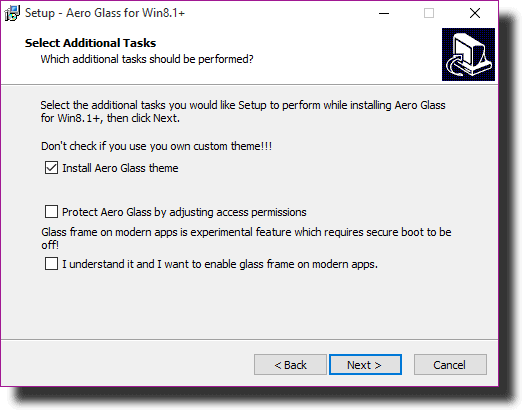
As soon as you download the Aero Glass .exe file run it and move through the installation wizard. Pay close attention to the third screen titled Select Additional Tasks. On this screen ensure that you check the Install Aero Glass Theme box, also take note of the warnings pertaining to using the custom themes.
The other two settings are optional and should be left disabled because they involve disabling your security settings. Afterward, click the Install button to proceed.
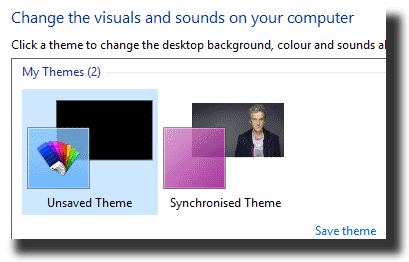
After installation, right-click on the desktop and go to Personalize, then Themes. Aero Glass will display a pop up message, this can be ignored. Select the Unsaved Theme and the Aero Glass theme becomes activated. You should immediately notice transparency being added to the window borders.
The watermark at the bottom can be removed by following this Youtube Video.
Winaero Tweaker
Winaero Tweaker packages a large collection of user interface tweaks into one app. This app is easy to use and gives good results. Download Winaero Tweaker, extract the contents, run WinAeroTweaker.exe, and agree to the license terms.
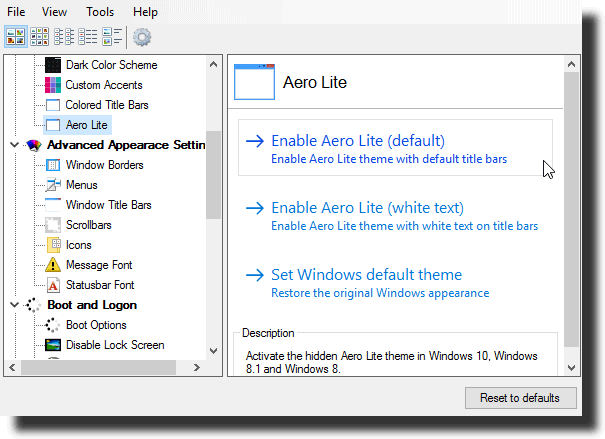
The app then opens, go to the left-hand pane, select Appearance, and then Aero Lite. This allows you to unlock and activate the Aero Lite theme, which is hidden in Windows 10.
The theme can be reverted back to normal by running WinAeroTweaker again and using the Reset to defaults button to undo all changes made with this tool.
Setting a Windows 7 Wallpaper
The right wallpaper is key to getting that Windows 7 feeling. The Windows 7 wallpaper can be downloaded from Imgur and can be set as your desktop wallpaper.
You can go further in making your Windows 10 look like Windows 7 by restoring the old file explorer layout. However, these visual changes should be more than enough to please you.
How to make Windows 10 look like Windows XP
Let us move on to how to make your Windows 10 look like Windows XP. Windows XP has been out of support since 2014 so it is much safer to use a theme on your Windows 10 than using the ancient operating system.
Before continuing, download the Classic Shell XP suite from Winaero and extract the files. The zip file contains a few files which will help give you the Windows XP theme on your Windows 10.
Create a Windows XP Start Menu
Head over to the Start Menu Style tab and select the button that is labeled Classic with two columns. Click on the Select skin text that appears below it. In the dropdown menu that is beside Skin, select Windows XP Luna.
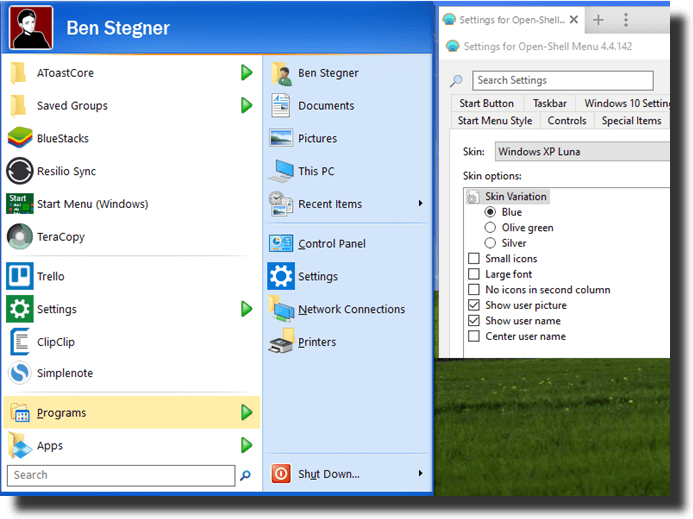
This gives your Start Menu the familiar look and feel of Windows XP. In the Skin Options box, change a few additional options if you like. Options like color, showing your user name and picture, and if it should show icons in the right column.
Configure these settings to your tastes and then click on the OK button.
Getting a Windows XP Style Taskbar
Move to the Taskbar tab, and check the Customize Taskbar box. Next, click on Taskbar texture and then on the ellipsis (…) button that is next to it. Browse to where the Windows XP suite was saved earlier and select the xp_bg file, it appears as a thin image.
Click on the Horizontal stretching option next in order to activate the skin. Choosing Stretch for both the Horizontal and Vertical stretching options should give you the best results. Click on the Ok button when you are finished and OpenShell uses this template to change your taskbar to the blue hue.
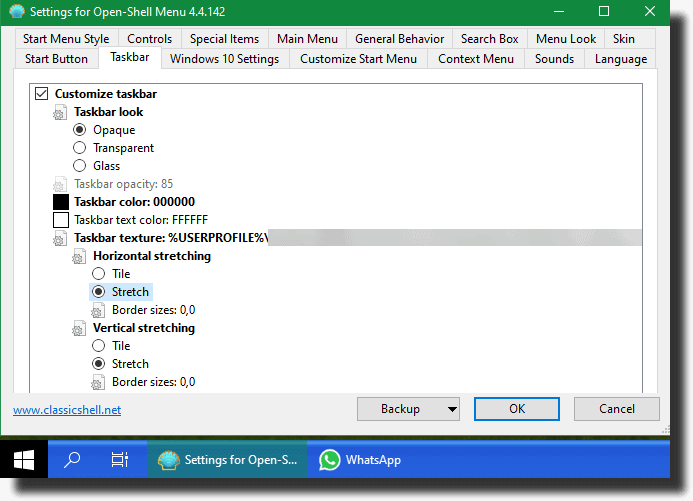
To go further with the Windows XP look, go to Settings, then Personalization, and then Taskbar. Set the Combine Taskbar Buttons to the Never option. This replaces all Windows 10 single-icon entries with full descriptions, like in Windows XP.
Adding a Windows XP Start Button
Next is the Windows XP Start Button. Move to the Start Button tab and click on the Replace Start button. Next, click on the Custom button, then Button Image, followed by the ellipsis (…) button just beside it.
Browse to where the extracted files were saved and click on the image labeled XPButton, it will look like three buttons stacked up. Then use the Button size field to ensure that it fits your taskbar accurately.
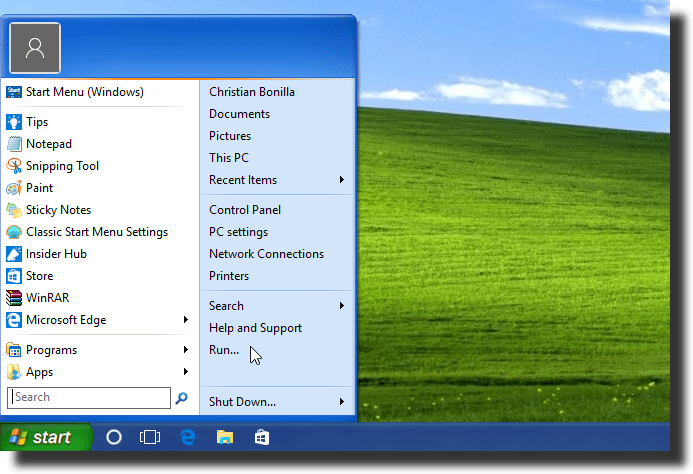
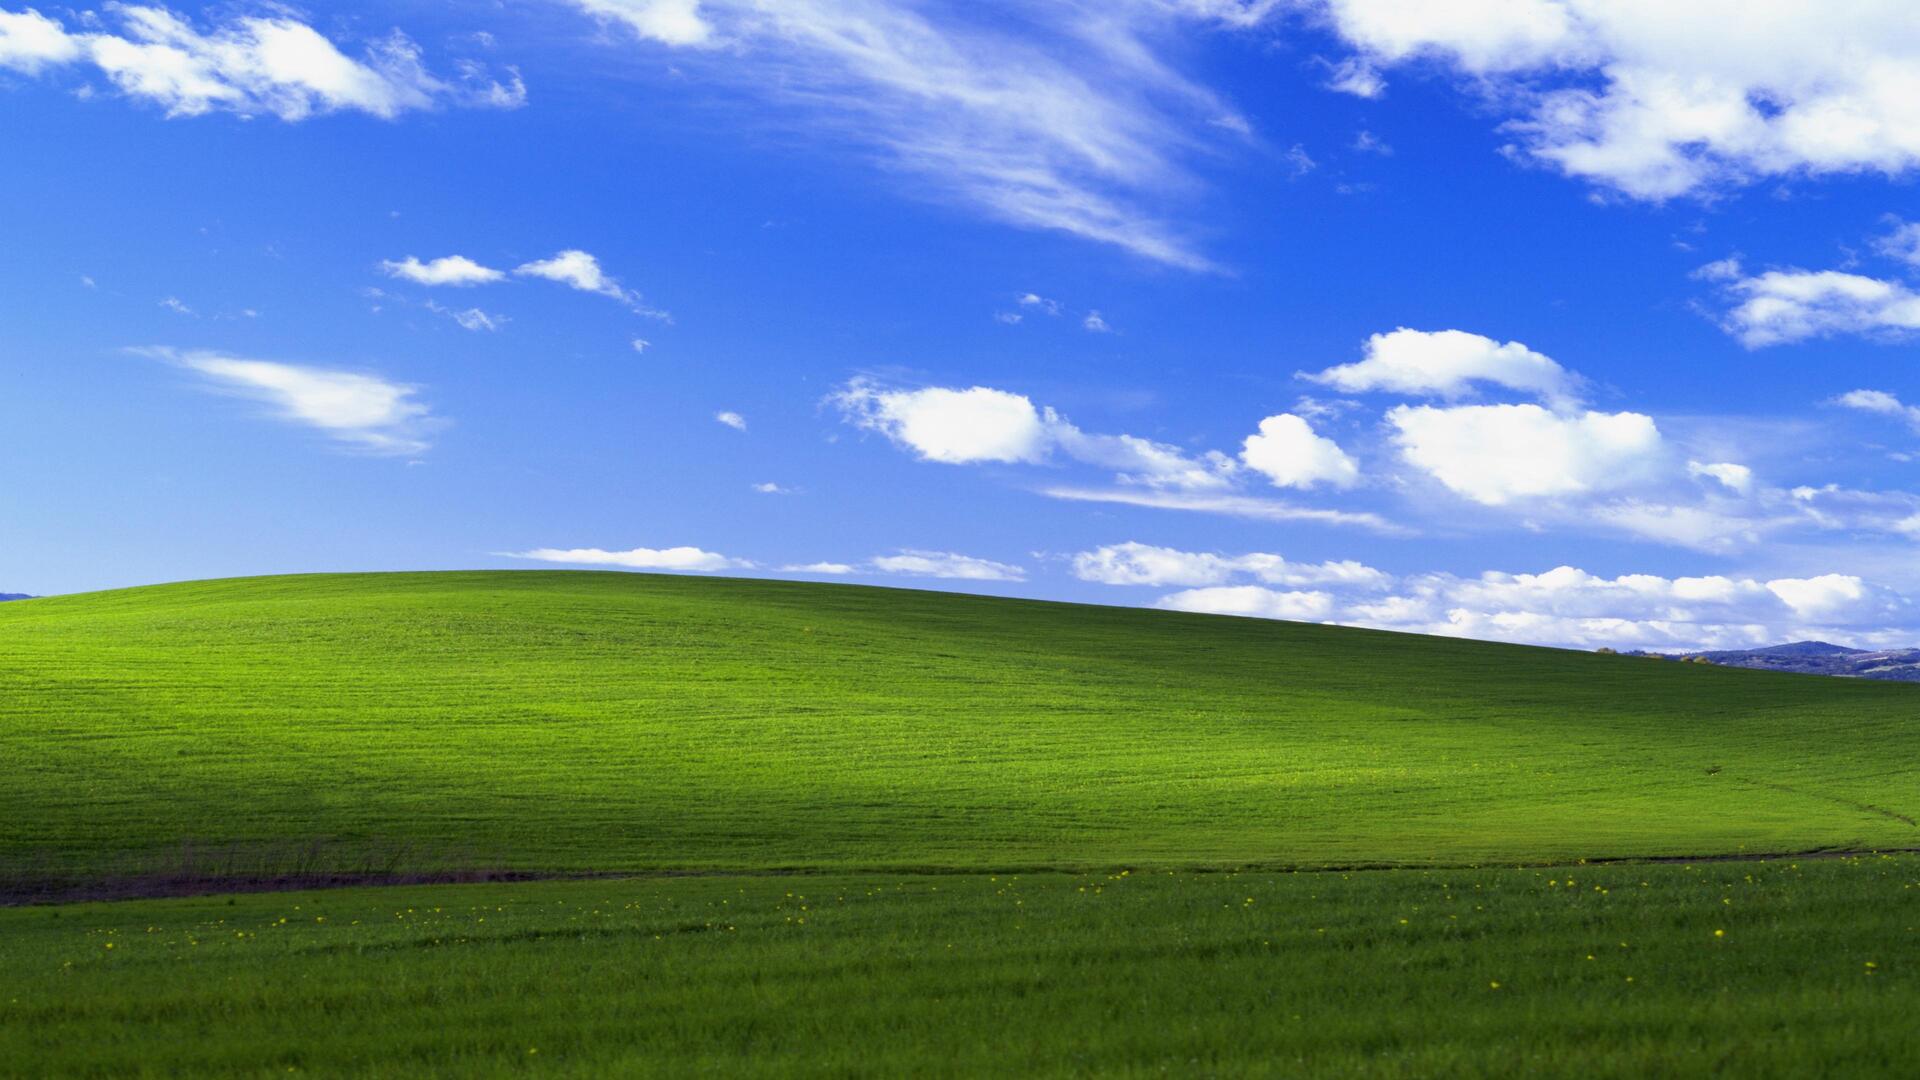
Get The Timeless Windows XP Wallpaper
This is the final touch in recreating the look of Windows XP on your Windows 10 system. Get a high-quality copy of the classic Bliss wallpaper and enjoy the calming green hill one more.
Now you can recreate your Windows 10 to look and feel like Windows 7 or XP.


")


