
The Microsoft-developed Remote Desktop utility did not always have the best reputation, mostly because competing products like TeamViewer have traditionally been better at handling remote connections, both in terms of performance and ease of use. Over the years, Microsoft has improved the utility and has also adds support for other systems including OS X, Linux, Android, iOS, and the mobile versions of Windows, of course.
An introduction to Remote Desktop
When we talking about remote connections, it is important to know a couple of terms so that you do not get confused. First, the “host” or “remote host” refers to the computer that we access remotely as it hosts the session. The “client” or “remote client” is the device you use to access the host. Only Pro or higher editions of Windows can act as hosts. All Windows editions can act as clients. This has been true since the days of Windows 7 and it has not changed with Windows 10.
When you connect to a host with Remote Desktop, the login screen will indicate that someone else has signed in remotely. Local users will be signed out instantly when you connect remotely but they can also kick you out simply by logging into the computer. The only way to automatically re-connect them after you end the session is to open a CMD window with administrative privileges and enter the following command:
tscon 1 /dest:console
Prepare the host
In order to prepare the host, all you need to do is enable a couple of settings at most.
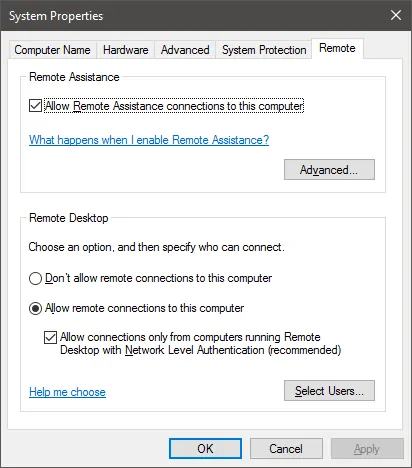
- Open your Start menu, type SystemPropertiesRemote and press Enter.
- Select the “Allow remote connections to this computer” option. The option that says about “Remote Desktop with Network Level Authentication” will block PCs running Windows Vista or earlier versions to connect to your own computer. If you do want to allow connections from those PCs, do not check that option.

- Click on OK to close the Window and save your settings.
- You now need to check if your network is private or public. If you are on a home network, you are most likely on a private connection already but we need to check and make sure anyway. To do that, right-click on the network icon in the system tray (bottom right corner of your screen) and choose to “Open Network and Sharing Center”. Look for the “Network” subheading and you will see whether your connection is Public, Work, or Private.
- In case you network is not Private, you will need to change it manually. Start by clicking on the “HomeGroup” option from the left-side panel.
- In the new window that opens, click on “Change network location”.
- A charm bar will appear on the right side of the screen, asking you to confirm your choice. Simply click on “Yes” to continue. Close the HomeGroup menu as you no longer need it.
- Go back to the Network and Sharing Center and your Network should now be set to private. Feel free to close the center too.
- Finally, you should make sure that the host computer will not sleep while you are connected to it. Just open the Settings, go to System > Power & Sleep and change the “Sleep” options to “Never”.
The Host is now ready, though you may need some additional information from it such as the computer’s name or its IP address. The name can be found by going to Settings > System > About. To find the local IP address, open a CMD window, enter the ipconfig command and look for the IPv4 Address field.
Connect from another Windows PC natively
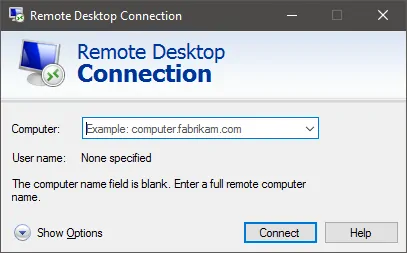
- Open your Start menu, type remote desktop or remote desktop connection and press Enter.
- In the Remote Desktop Connection window, enter the name of the host computer or its IP address.

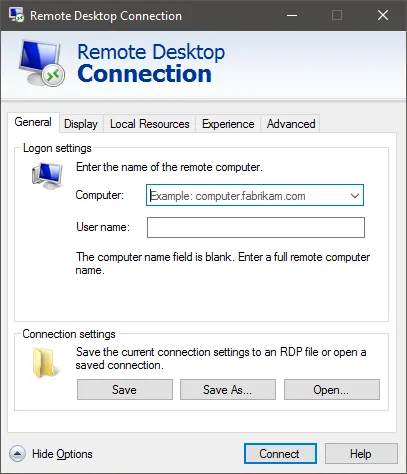
- You now have two options. To configure additional settings or change the default ones, click on “Show Options”. To immediately connect to the host, click on the “Connect” button instead.
- If this is a one-time-only thing, there is no need to configure anything. But if you are planning on connecting to that host again, click on the “Save As” button to save the connection in a file which you can access from anywhere in your computer. You should also take a look at the Display and Local Resources tabs to change the resolution, audio options and accessible devices.

- After clicking on the Connect button, you will have to enter the host’s credentials in order to continue. In case the host and client computers both share the same credentials, all you will have to do is enter your password one more time. When you are done, click on the OK button to continue.
- At this point you will probably get a warning about the other computer’s security certificate. This is completely normal so just check the box that reads” Don’t ask me again for connections to this computer” and click on “Yes” to finally connect to your host.
Connect with the Microsoft Remote Desktop app (Windows and Windows Mobile)
In case you do not want to use the native utility, Microsoft provides another version of the Remote Desktop as a standalone app in the Store.
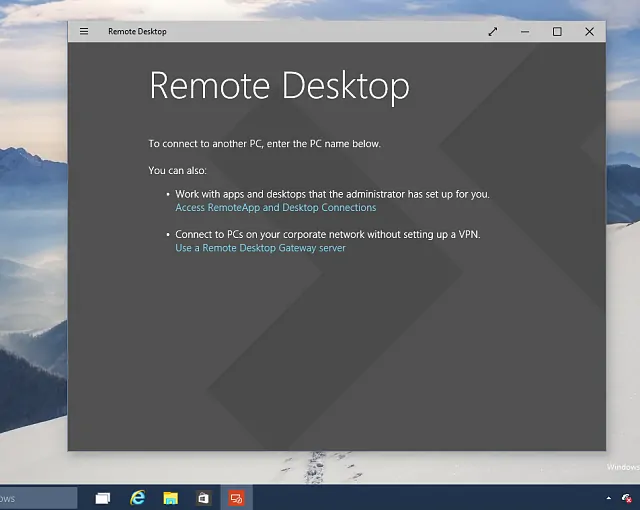
- Open the Windows Store, search for Remote Desktop and install the app.
- Launch the app and enter the host computer’s name or IP address in the bottom field.
- Click on the Connect button.

- You will be asked to enter the credentials. An important thing to note is that if you are not using a Microsoft account, you will need to enter the username like so:
ComputerName\Username
g. FileCluster\Adam - After clicking on OK, you will get a warning about the security certificate. Check the box to ensure you will not get the message again in the future and click on “Connect anyway”.
- The difference between this app and the local utility is that the app allows you to make changes even after you connect. You are free to change the resolution, add devices like printers and drives, add visual effects, and a lot more.
Connect with the Remote Desktop app for Android, iOS, and OS X
The second version of the Remote Desktop app is available for Android, iOS and OS X devices. Aside from some UI differences, the app is essentially the same across all platforms.
- Start by getting the appropriate version of the app for Android, iOS or OS X.
- After launching the app, click on the Plus icon and choose the “Desktop” or “Remote Desktop” options.
- Enter the credentials of the host PC.
- Optionally change the default settings. For instance, you can choose whether sound will play on the host device or the client one.
- When you are done, click on the Save button.

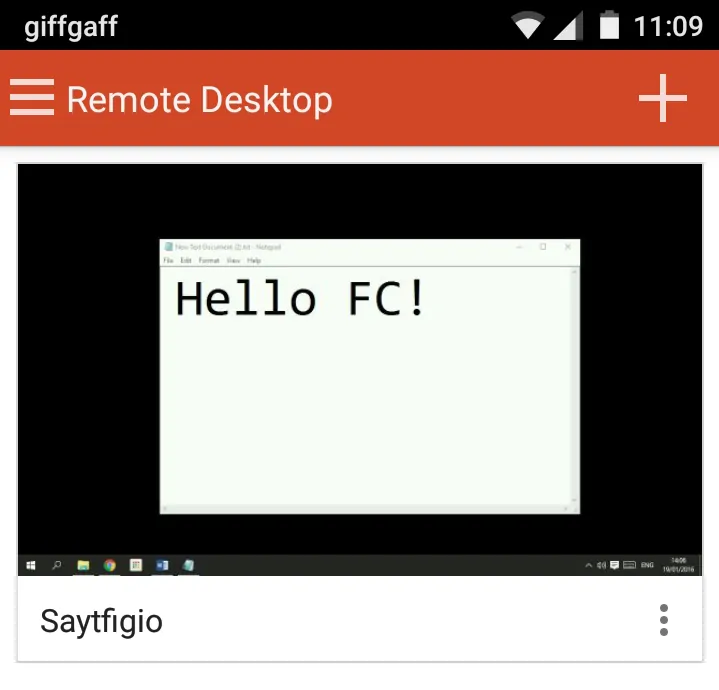
- You can now connect to the remote desktop whenever you want simply by tapping on its thumbnail.

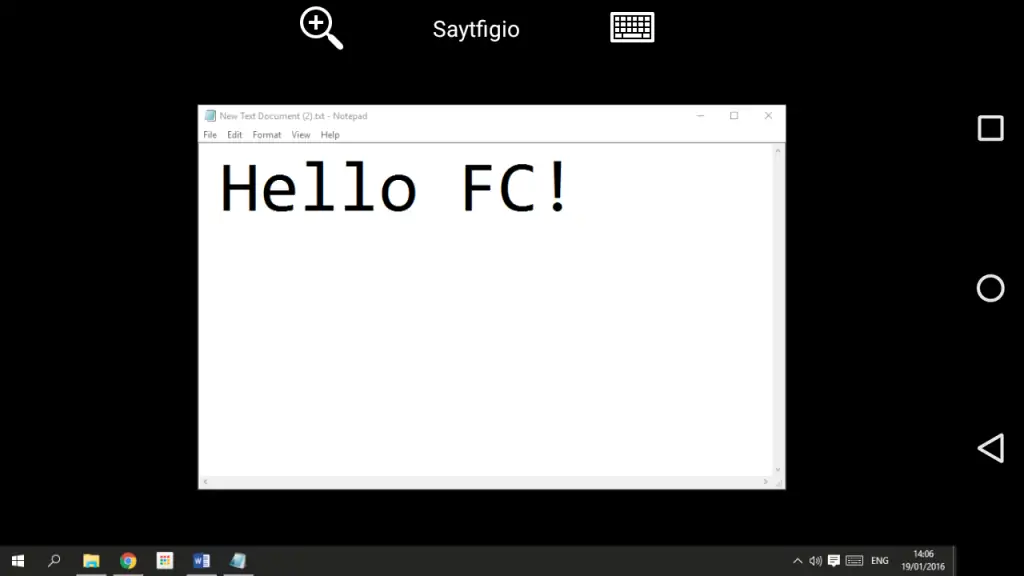
The touch versions of the app offer quite a few options, despite the initial appearance. For instance, by swiping right from the left side of the screen, you can open the Alt + Tab window. By clicking on the name of the PC, you can instantly change the input mode from “Mouse Pointer” to “Touch” which can instantly turn your boring old desktop into a touch-enabled device.


")

