
When you have multiple drives connected to a single system, you can take advantage of a feature called ‘Storage Spaces’ in order to combine those drives together or mirror each one of them. The utility basically allows you to create a virtual ‘storage pool’ of your combined drives so that you can manage all of them from a single spot. Furthermore, the feature can be used for backup purposes as you can set it up so that your drives are protected from failures.
Simple uses of Storage Spaces
In truth, the average user has little to no need of the Storage Spaces feature. Combining multiple drives into a single (virtual) folder may sound enticing but the trouble is not always worth it. With that said, there are some cases where Storage Spaces is absolutely the most convenient solution. For example, when you set up a home media server, having all of your available drives connected into a single folder will let you manage your movies, songs, and whatever else you have on the server much more easily.
Furthermore, storage spaces are very flexible due to the simple fact that you can always make them bigger than your currently available physical space. So if you have two drives which offer 240GB of physical storage space combined, you can still create a storage pool of say, 800GB. Because when your storage pool fills up to 200GB, the feature will ask you to connect additional drives which will work instantly without any further configuration from your part.
When you just want to combine your drives in order to manage them more efficiently, all you need to start a storage pool is a single additional drive, other than the system one you use for Windows. Such storage pools are vulnerable to data loss should one of the drives fail but they use no space for backups so you can maximize their capacities.
Storage Spaces and data security
As I mentioned before, utility is not the only purpose of Storage Spaces. In fact, the feature supports several resiliency types which can be used to protect your data in case one or more of your connected drives fail. Different resiliency types require different numbers of drives so here is a look at the available options:
- None: This is what I was talking about in the previous section. The so-called simple spaces can be started with a single additional drive but they do not protect against drive failure as no data is backed up. The best option for those who do simply want to maximize storage efficiency.
- Two-way mirror: As the name implies, this layout stores two copies of your data and as such requires at least two drives. This will protect you against a single drive’s failure as both of them will hold the exact same data.
- Three-way mirror: Same as above with the only difference being that your data needs to be copied amongst at least three drives.
- Parity: Layouts that attempt to combine storage efficiency and data protection. Parity spaces require at least three drives in order to protect you against a single driver’s failure. This layout is best used for archiving data and storing files that you do not access frequently or at least do not overwrite often.
Setting up Storage Spaces
At this point you should have some understanding of how storage spaces work, especially in regards to resiliency types. We will now move from the theoretical aspects of Storage Spaces and delve into the practical bits as we set up our own storage pool.
- Start by connecting all of your available drives to your computer.
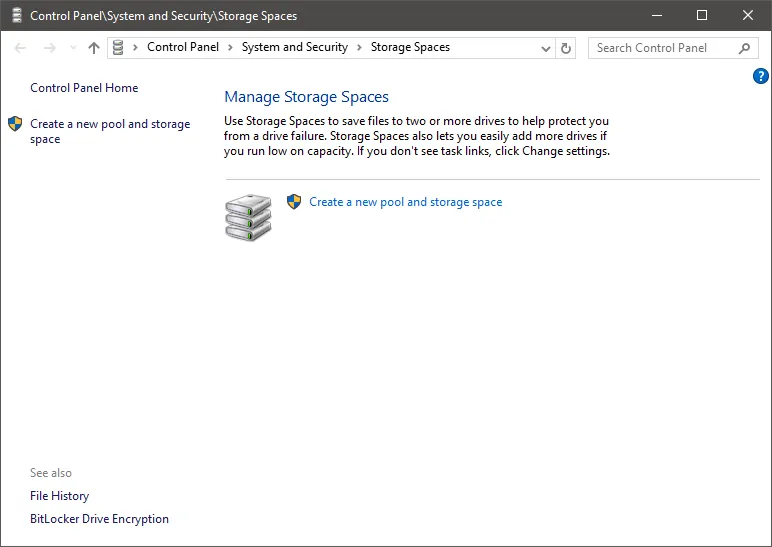
- Open your Start menu, type Storage Spaces and press Enter.
- The window that opens will soon be filled with information about your storage pool and the drives inside it but since this is the first time you are using the feature, the only thing you will see in there is a link that reads “Create a new pool and storage space” so click on it to continue.

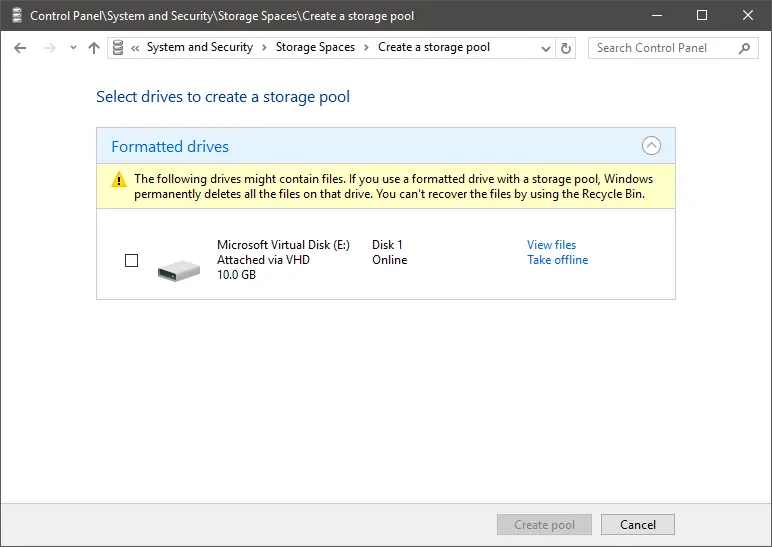
- The next section will show you a list of available drives which you can use to create a storage pool. Select the ones you want and click on the “Create pool” button. Do note that all data will be erased from the drives so create backups if you need to keep anything.
Now that you have chosen the initial pool of drives, it is time to create a storage space. The next menu will let you configure everything about the storage space, including its name, drive letter, resiliency type, and capacity.
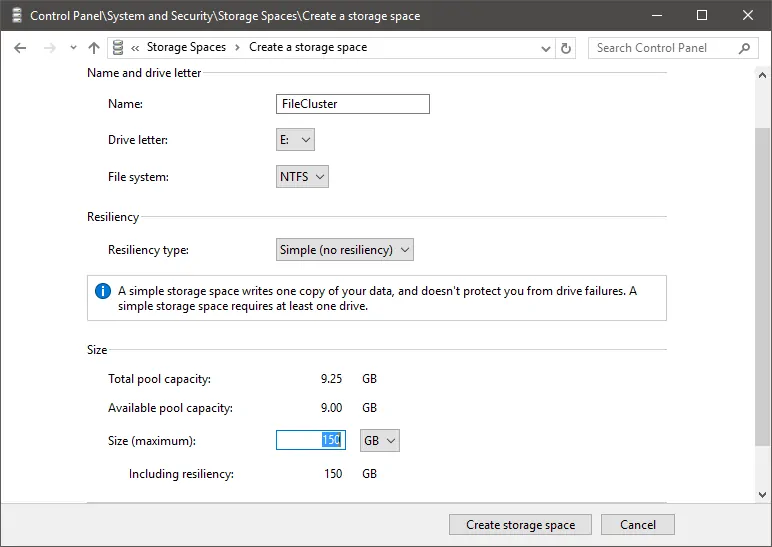
Choose anything you want for the name and drive letter and choose the resiliency type based on what we have already said. As for the logical size, it is generally a good idea to create a storage space that is much higher than the actual physical capacity of the drives you have currently connected to your systems as you can always add more in the future. Once everything has been properly configured, click on the “Create storage space” button.
Using and managing Storage Spaces
Open Windows/File Explorer and you will see your newly created storage pool appear like a perfectly normal drive. Windows makes almost no distinction between virtual and physical drives so you can use it in any way you want. You can even enable BitLocker and encrypt the drive in case you are planning to store sensitive information in it.
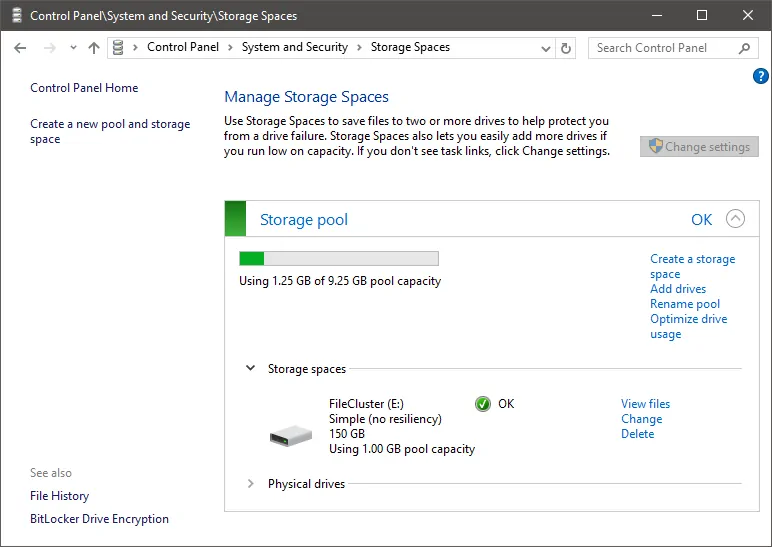
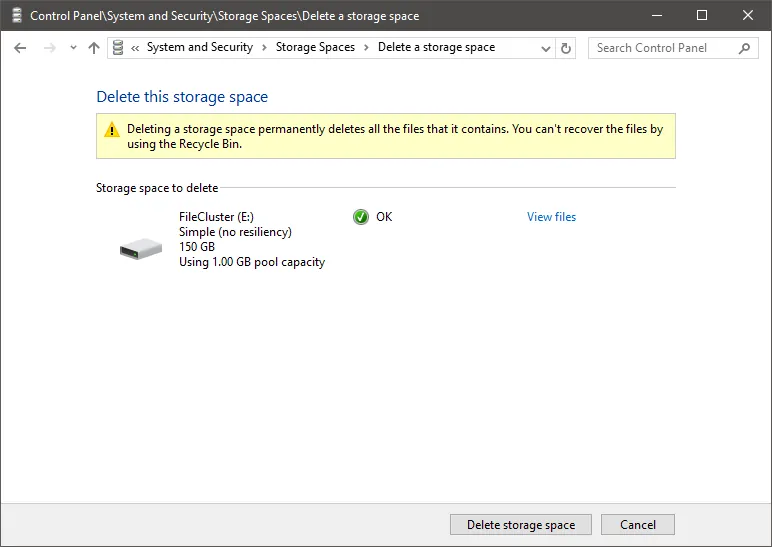
The important thing to know about Storage Spaces is that you have to manage them from their very own utility and not through any other tool in Windows. The utility provides options to create additional storage spaces, add and remove drives, and generally perform any action related to storage pools. The only thing worth noting here is that when you remove a drive from your storage pool, you need to re-format it, otherwise it will not even appear in File Explorer.
To do that, open Disk Management, right-click on the affected drive and select to create a “New Simple Volume”. Follow the steps on the screen and you will be able to format the drive in no time.
That is about all you need to know for Storage Spaces. If you run into any issues before or after creating a storage pool and a storage space, feel free to drop a comment down below and we will get back to you as soon as possible!


")


