
Even before all details about Windows 10 were revealed, Microsoft had been promising that Skype would have an important part to play as it would be integrated into the OS as the default messaging service. Now that the dust has settled and Windows 10 continues to grow, that integration is into full effect and the Skype-powered Messaging app is available in every Windows 10 device including desktops, laptops, tablets, and mobile phones. Today we will take an in-depth look at the Messaging app and how you can use it to send text messages to anyone in your contacts.
Set up the Messaging app
Most Windows 10 PCs receive automatic updates for universal apps via the Windows Store but that is not always the case. So before we proceed, open the Windows Store, click on your profile icon and go to the updates section. Download all available updates for the universal apps to ensure that there are no conflicting issues or bugs.
Microsoft accounts
- Open your Start menu, type messaging and press Enter.
- Once the Messaging app opens, it will pop up an introductory message so just click on “Continue” to move on.
- The rest of the set up process depends on the type of account you are currently using. If you are logged in with a Microsoft account, all you have to do is keep clicking on “Continue” as the app will automatically enable the account for Skype. If that Microsoft account is already associated with a Skype account, you can opt to use that one instead.
Local accounts
In case you are using a local account, things are a bit more complicated and you need to pay special attention during the setup process.
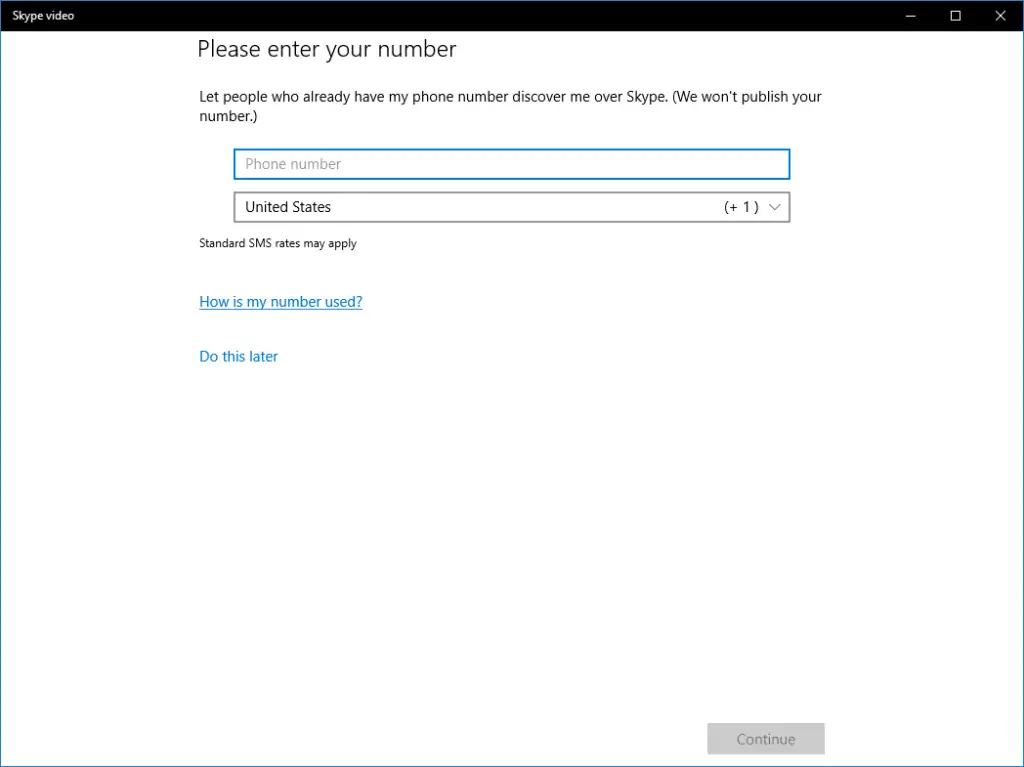
- As you will be able to see for yourself, there is no way to avoid using a Microsoft account as it is needed for Skype. In the first page, all you have to do is enter your credentials or create a new account on the spot.
- Select a verification method (email or text), enter the information Microsoft asks (such as the last four digits of your phone) and click on Next.
- Now, enter the code you received on your email or your phone and click on Next again.
- This page is extremely important. If you just click on “Next”, Windows 10 will start using this Microsoft account to log you into the system. Since you are using a local account, I am guessing that you do not want that to happen. Instead, you should click on “Sign in to just this app instead” which will simply use your Microsoft account for the Messaging app. I am fairly certain that Microsoft will soon get into trouble for this but I digress.
- When you are done with that, keep on clicking “Continue” and the app will gather relevant information like your existing email contacts.
Send messages
In contrast to Skype, the Messaging app features a minimalist interface with very few features as it is focused entirely on chatting with your friends, family, and various other acquaintances.
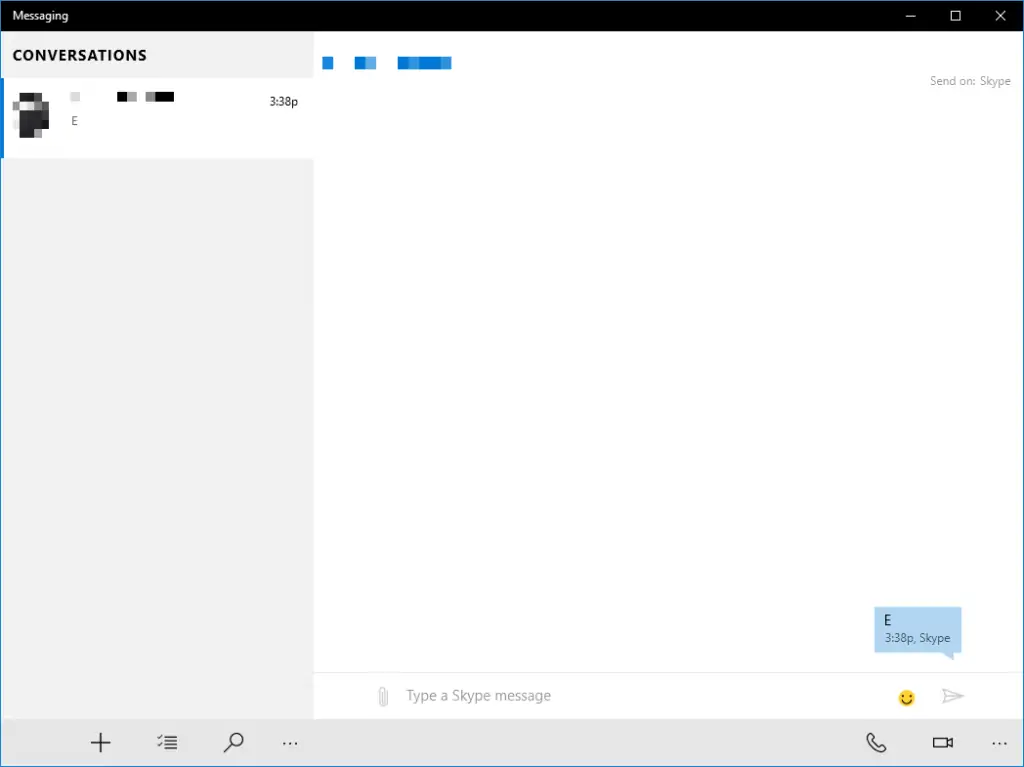
- To send a message to someone, start by clicking on the plus (+) icon on the bottom left corner.
- This will open the messaging interface on the right side. The search field at the top lets you search for contacts on the spot while the plus icon opens a full list of your contacts for you to navigate through. It is worth noting that you can add multiple contacts which are separated by a semicolon, either manually or automatically.
- The messaging features are pretty basic but they do support emoticons, special characters, and even attachments. When you are done with your message, press Enter (or Ctrl + Enter in some cases) or click on the Reply icon next to the smiley face.
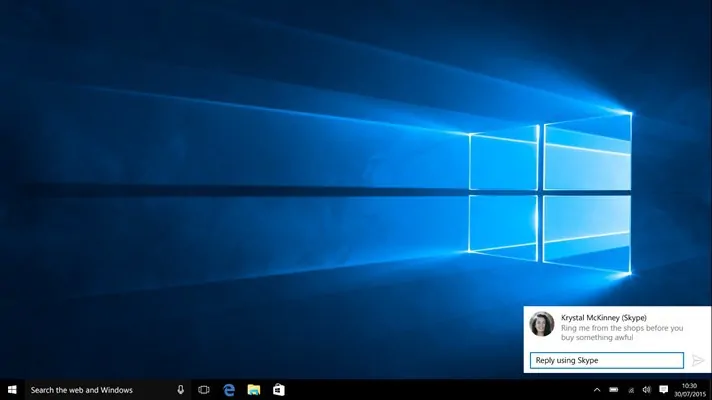
- When you send anything through the Messaging app to another Windows 10 PC, the other person will receive an interactive notification. If they click on the empty field of the notification, they can type a reply on the spot without ever opening the messaging app. If they miss the interactive notification, they will still be able to find your message in the Action Center as well as the Messaging app.
Muting conversations
When you are participating in group conversations, the constant barrage of notifications can quickly become unbearable, especially if you are one of those people who likes to have sound notifications enabled for messages. Instead of leaving the conversation and abandoning your friends and family, you can easily mute the conversation so that you no longer receive notifications from that particular person or group.
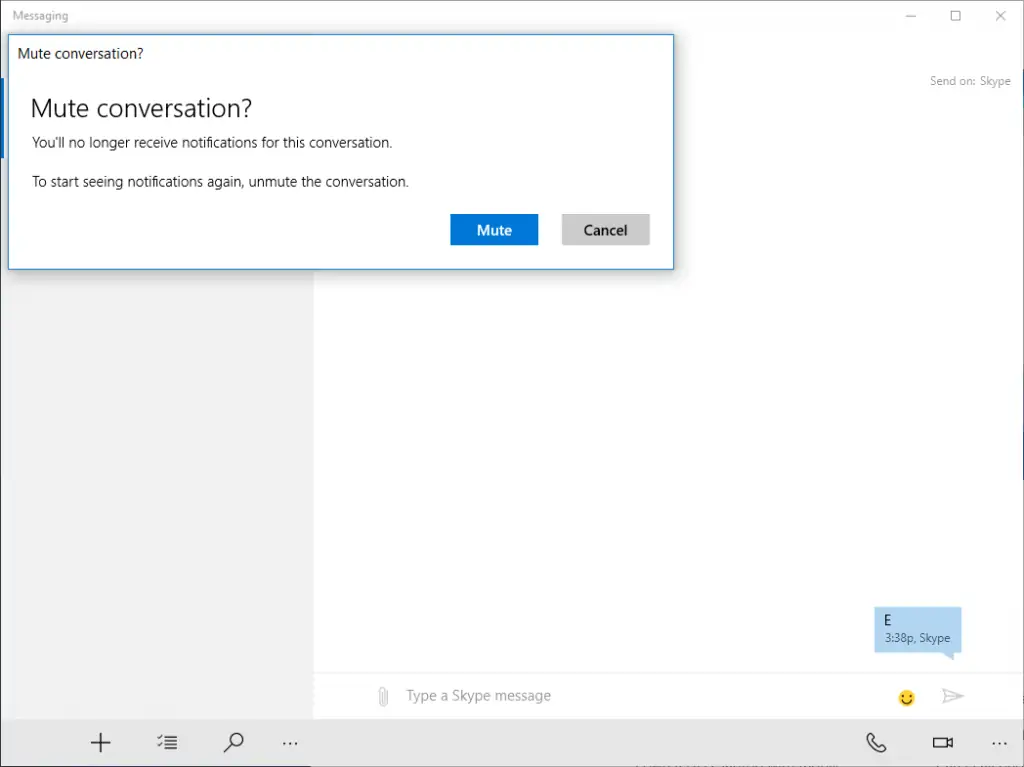
After launching the Messaging app, find the conversation you want to mute and right-click on it. Then, select the “Mute” option and confirm your choice by clicking on the “Mute” button. Should you decide to follow the conversation again, you can right-click on it once more and select the “Unmute” option. Do note that you will still receive messages in muted conversations. Only the notifications will be blocked by muting so that you can get some peace and quiet.
Deleting conversations
When you are planning to play a prank on your siblings, it is probably a good idea to remove as much of the evidence as possible including any potentially suspicious conversations that they can access from your computer (or even worse, the shared computer of the house). Deleting a conversation does not mean you will no longer receive messages from the person/people that participated in it so do not worry about that.
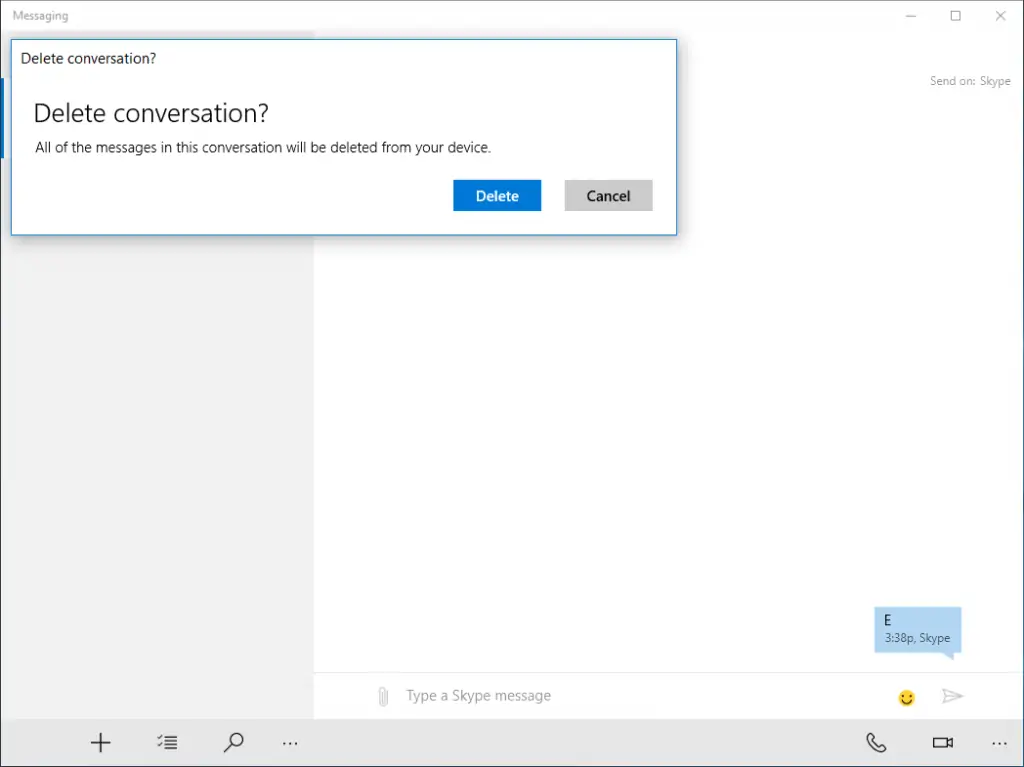
There are two ways to delete a conversation. The first is to simply right-click on it and select the “Delete” option. The second is to click on the “Select” icon from the bottom toolbar. The icon is located between the “Add” and “Search” icons in case you are wondering. After clicking on the icon, you will be able to select multiple conversations at the same time. Once you are done, click on the Delete button from that same toolbar.


")


