
The Calendar app is included in every Windows 10 installation as a part of Microsoft’s Universal Apps package. Like Mail and People, Calendar can gather all of your accounts and use them in a single, unified platform. As a Universal App, Calendar not only syncs with your desktop but also with every other available platform including Android, iOS, and Windows 10 Mobile. Today I will guide you through the Calendar and show you that creating and syncing events is easier than ever.
Starting with the Windows 10 Calendar
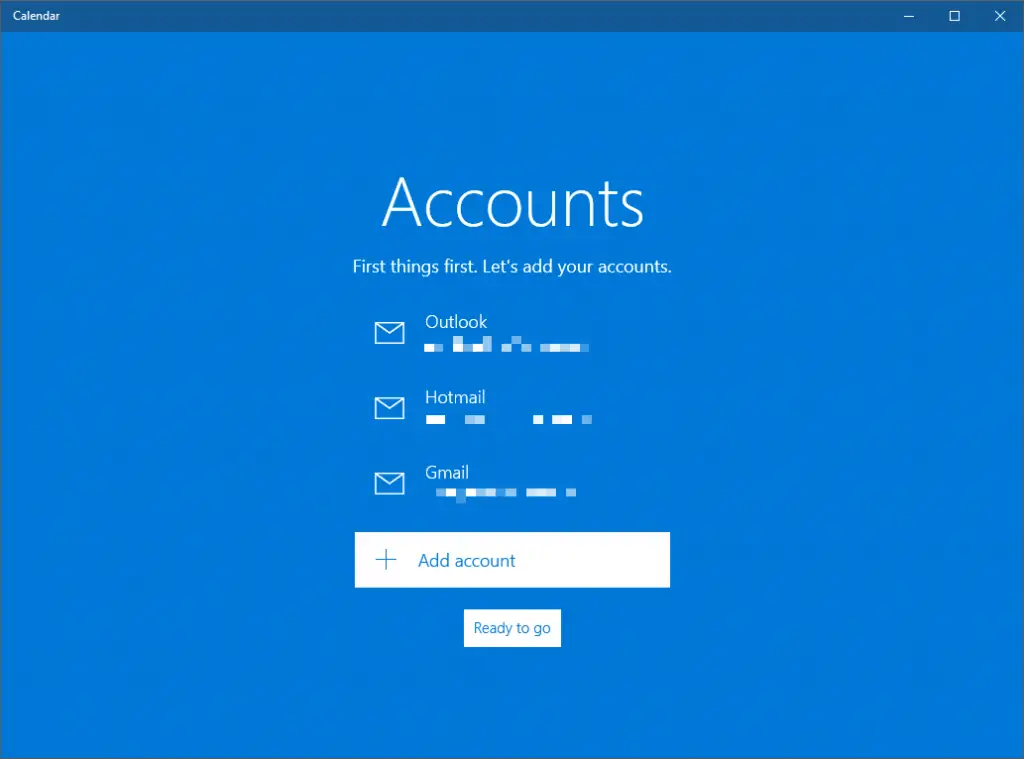
After launching the application for the first time, click on the “Get started” button to continue. The next page will let you add your Outlook, Gmail, and iCloud accounts right away. If you have already added your email addresses to the Mail app, they will already exist in Calendar because all settings are synced between the connected Universal Apps of Windows 10.
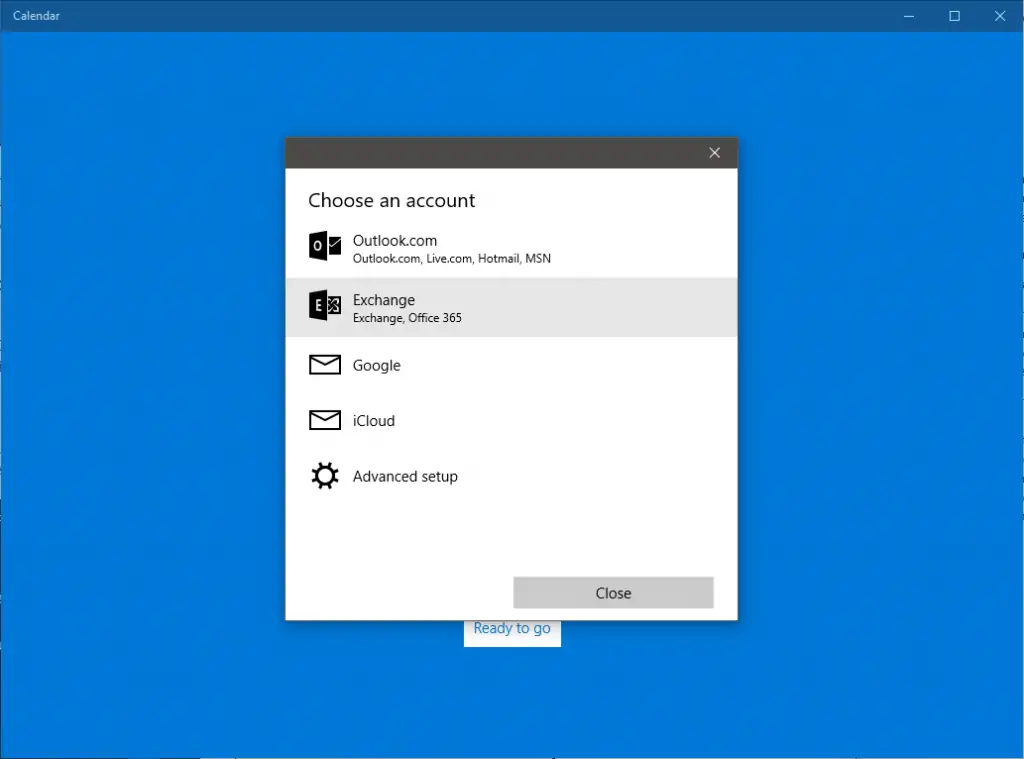
Of course, adding new accounts is incredibly easy as well.
After clicking on the “Add Account” button, choose your email provider from the list, enter your credentials and authorize Calendar so that it can retrieve information from your account.
If your email address is not supported, you will need to click on the “Advanced setup” option instead. There you will find an “Internet email” option where everything has to be configured automatically.
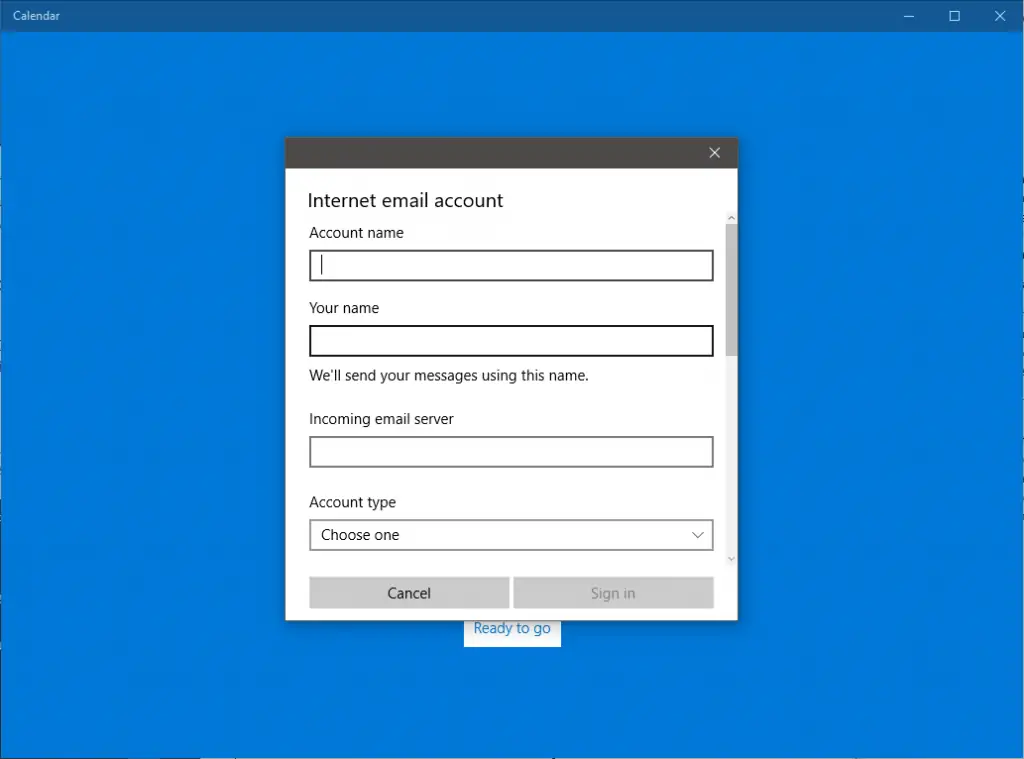
Your email provide can supply you with all the relevant information though a quick Google search will also work fine. Just search “ServiceName Email Settings” (e.g. Yahoo Email Settings) and you will be able to find all the relevant entries.
There is no need to worry about adding all of your email accounts at once because you can always configure additional addresses later on. When you are done, click on the “Ready to go” button and you will be redirected to the main Calendar interface.
Navigating the Calendar
Microsoft’s new design guidelines have resulted in several improvements across all areas of Window and Universal Windows Platform (UWP) apps are perhaps the most obvious example of this. Calendar features a minimalist interface with clearly defined lines though there are some obvious problems. For instance, running the app in a window smaller than the default one can hide the full title of events as they are supposed to be shown in a single line.
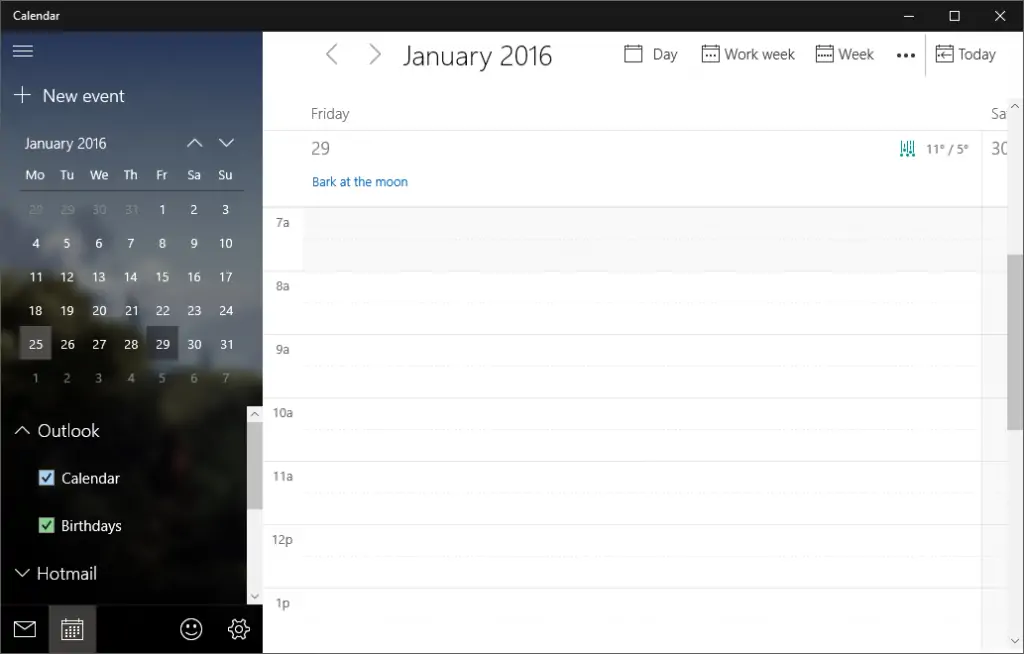
Nevertheless, navigating the app is inherently easy because of the way the main calendar window is displayed. By default, Calendar shows a monthly view but that can be changed simply by clicking on another option at the top. The option to show the Work week is brilliant because you can easily manage work-related calendars from that view and then switch over to another mode when you are done. Furthermore, the dropdown menu next to the “Day” view allows you to display 1-6 days in a single page which can come in handy when you are managing events that last for several days.
When you want to keep the current day in view but also want to navigate to a different time, you can use the calendar on the left side pane instead. You will need to click on the hamburger menu (the icon with the three lines) in order to bring that panel up. Though that menu does not actually list any events, you can freely move up and down without affecting the actual UI so you can quickly check what day the 29th of February is, for instance (hint: it’s a Monday).
On a side note, you can also change the different views by pressing Ctrl + Alt 1-4 in case you are inclined towards keyboard shortcuts.
Adding and managing events
Calendar offers two different ways of creating new events. The first and easiest way is to click on a day or time (when you are on the Day view). This will open a tiny new window where you can add various details about your event including its name, time, and location. Furthermore, you can select which calendar the event will be added to, provided that you have added multiple email addresses and their corresponding calendars. In case the time period options are greyed out, uncheck the “All day” box first and the options should become available immediately.
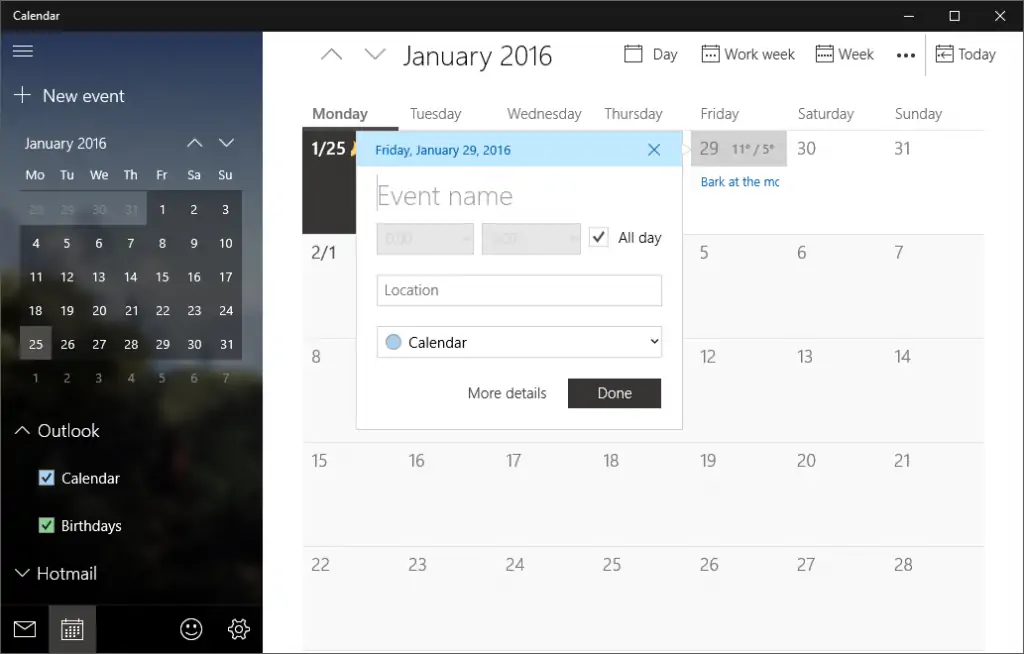
Clicking on “More details” will take you to an entirely new window where you will be able to enter more detailed information about the event. The “New Event” option at the very top of the left-side navigation pane will also lead you to this page though you will have to select the date/time manually if you decide to go that way.

The advanced menu is perfect for more complex events as there are a lot more features that you can take advantage of here. For example, you can choose when Calendar will initially remind you about the event by changing the “Reminder” option. In addition to that, you can choose between Free, Tentative, Busy, and Out of Office in the “Show As” field because not all events are treated equally.
Furthermore, you can add people from your contacts list (which is automatically imported from your email account) and then send an invite to the event instead of just saving it to your calendar. If the recipient uses the Calendar app, they can instantly import the event to their own calendar so they will have no excuse if they do not show up. Finally, all events can be set as “private” by clicking on the padlock-like icon on the top right.
When you want to manage multiple events at the same time, clicking on the “Pop Out” option in the advanced menu will force the event to appear in a separate window. You can then create a new event and repeat the process as many times as you want until your screen is filled with every event imaginable. Just remember to click on “Save and Close” (or Send, when you are inviting people) otherwise your progress will not be saved.
Viewing events
As you might have already noticed, some providers automatically add certain events to your calendar like the birthdays of your contacts, important holidays, and more. You can view those events as well as the events that you have manually added to your calendar by browsing through the calendar. When you roll your mouse over an event, you will get additional information about it such as the exact time it will happen.
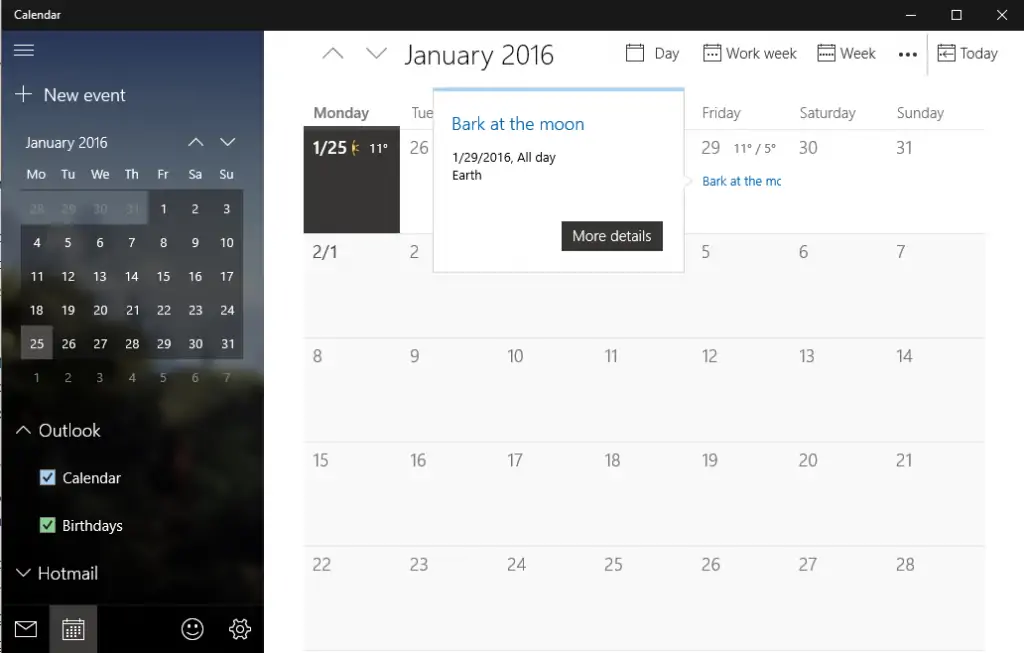
Clicking on “More details” is the only way to view complete information, including the event’s description. Furthermore, the menu lets you edit events on the spot so you cannot only view what is happening in your days/weeks/months but you can also make changes almost instantly. For a better experience, you might want to press the “Esc” key when you are viewing an event in order to easily close the window and get back to the main calendar.
Extras
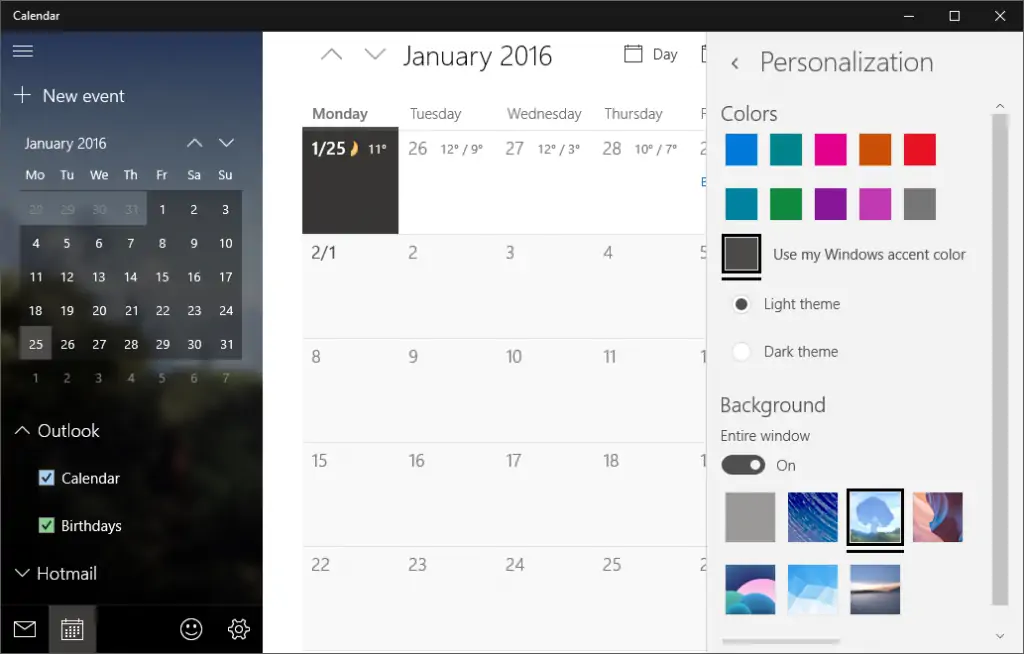
We have now covered most of the basic things you should know about the Calendar app but we are not done yet. In fact, the app allows for some very decent customization options, including a feature that provides a 5-day weather forecast. To begin with, click on the Gear icon situated at the bottom of the left-side pane. In the Settings menu that opens, go to Personalization and you will find loads of different backgrounds and color themes that you can choose from. To add a picture of your own, click on the “Browse” button and select one of your own photos.
Once you are done with the Personalization menu, head back to the main Settings menu and open the Calendar Settings section. This menu will let you set your working week and working hours, enable week numbers, add holidays and enable alternate calendars. Remember that your calendar may already contain a number of major holidays so check first to avoid adding them again.
As for the weather data, you do not actually enable the feature from this menu. The Weather Settings section merely lets you choose between Celsius and Fahrenheit but the actual feature is managed through the Windows 10 Settings. If you have allowed Mail and Calendar to use your location, the Calendar will automatically feature weather information. Otherwise, open the Settings (WinKey + I) and go to Privacy > Location. If the location is already on, just scroll down and enable the toggles for the aforementioned apps. If not, just enable the Location toggle first before scrolling down.


")


