
If you’ve been having Audio problems with your Windows laptop or PC, there are a handful of suggestions that might fix it. One of the quick ways you can do this is to reinstall your PC’s sound driver.
Commonly, Windows laptops and PCs have Realtek sound drivers, connecting the PC and its speakers. Hence, we’ll take that as an example.
Reinstall the Realtek audio driver on your Windows 10
Method 1: Reinstall the Realtek audio driver through the device manager
The first thing you should do to install a new audio driver is to locate and uninstall the current audio driver you have. In this case, that’s the Realtek HD Audio Codec Driver.
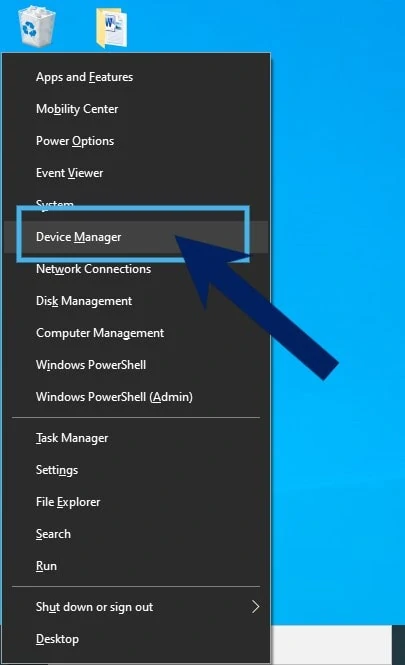
Press the Windows key + X then select Device Manager to find all devices currently run by your computer.
Double click on the Sound, video, and game controllers and look for your audio driver. In this case, look for the Realtek High Definition Audio. Right-click on the audio driver then choose Uninstall.
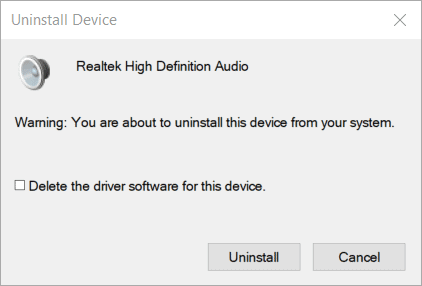
Tick the box for the Delete the driver software for this device option then proceed to click Uninstall.
Your PC might have duplicated drivers for safety so you’ll need to find the duplicates as well.
Click View and Show hidden devices and try to see if there are any Audio driver. Uninstall them if you found any.
When you’re done, restart Windows. Your PC or laptop can automatically attempt to find and install a new driver as it restarts. If there is no audio driver automatically reinstalled, go to the Realtek HD Audio Driver download page.
Wait for the download to be completed and when it’s done, open the installer. Follow the setup wizard to install the Realtek HD Audio Driver and restart Windows.
Method 2: Reinstall the audio driver through Programs and Features
You can also try to uninstall the Realtek audio driver through the Program and Features menu.
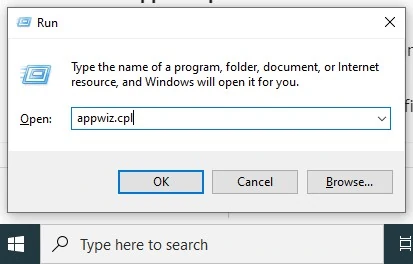
First, open the Programs and Feature window by pressing Windows key + R, typing in appwiz.cpl in the Run box then click OK.
In the Programs and Features’ search programs box, type in Realtek.
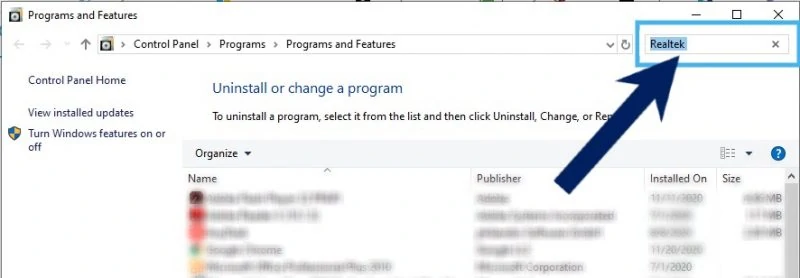
Once you see the Realtek High Definition Audio Driver, right-click on it then click the Uninstall button. A pop-up notification may appear which will require you to confirm your option.
After uninstalling, restart Windows. Check if you have a new audio driver installed or reinstall Realtek Audio driver through the same process as above.
Check and see if this solves the problem regarding your PC or laptop’s audio. You can also do the same methods above even if your audio driver is not Realtek.


")


