
Have you ever seen the message that says, ‘Your PC is low on memory, free up some space’ on your computer? There’s no need to fear when you see it, it only means that your RAM is getting clogged up.
RAM is an acronym for Random Access Memory, a short term storage device that contains any program or process that is currently running on your computer. The computer keeps the information it needs at a given moment here, instead of going back to your hard drive to look for it.
That being said, the more RAM your computer has, the more programs or processes it can run at the same time without slowing down or negatively affecting performance. If your computer runs low on RAM, it begins to use a part of the storage device called the page file. This will act like a virtual RAM.
The page file is much slower than the actual RAM, this is why you will notice your computer slowing down when it uses it. The RAM is only a short term memory and volatile, this is why you will lose any information on it as soon as your computer switches off.
Anything that must be kept should be saved in permanent storage like a hard drive, flash drive, or SSD.
How to Free Up RAM on Your PC
There are a number of methods you can use to free up the RAM on your PC. You will not need to do these all the time, they are useful for when you notice your computer slowing down.
Restart Your Computer
This is the quickest, easiest way to clear your RAM, and a tip that should be familiar with everyone.
Keep in mind that restarting your PC will completely clear the RAM and restart all default running processes. Ensure that you save whatever you are working on because they will be lost as soon as you restart your PC.
While doing this will not increase the maximum RAM available on your PC, it will clean up all processes that are running in the background which you cannot see. These background processes could be what might have been using up your RAM.
Ensure you restart your computer regularly in order to keep the RAM from getting clogged up.
Check RAM Usage with Windows Diagnostic Tools
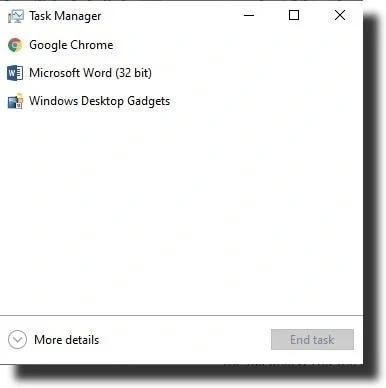
If you want to know what apps are filling up your RAM, you do not have to guess. Windows provides some diagnostic tools to show you. To get started, you need to open the Task Manager. You do this by either searching for it in the Start Menu, using the Ctrl + Shift + Esc shortcut, or by right-clicking on the taskbar with your mouse and selecting Task Manager.
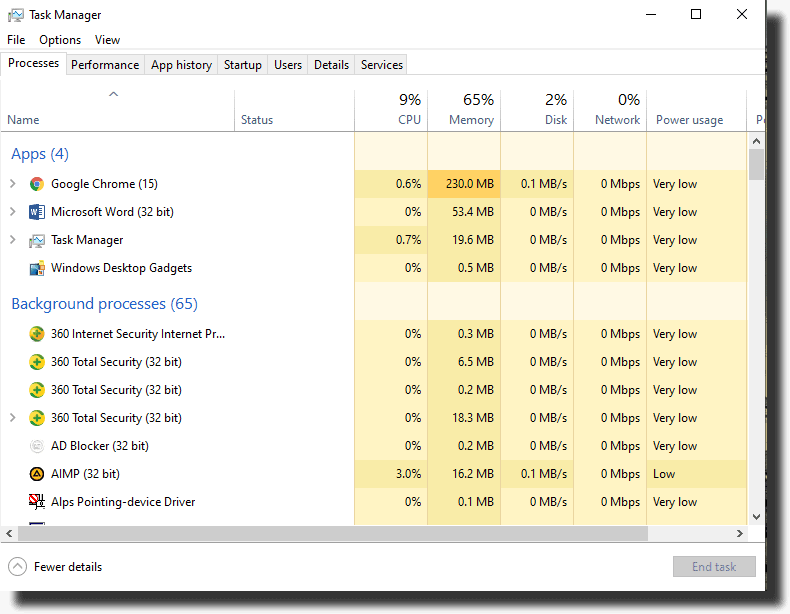
Click on the More details button located on the bottom-left corner of the window, this will expand it to the full utility. You will be taken to the Processes tab first, here click on the Memory header in order to sort all the apps in terms of RAM usage, from the most to the least.
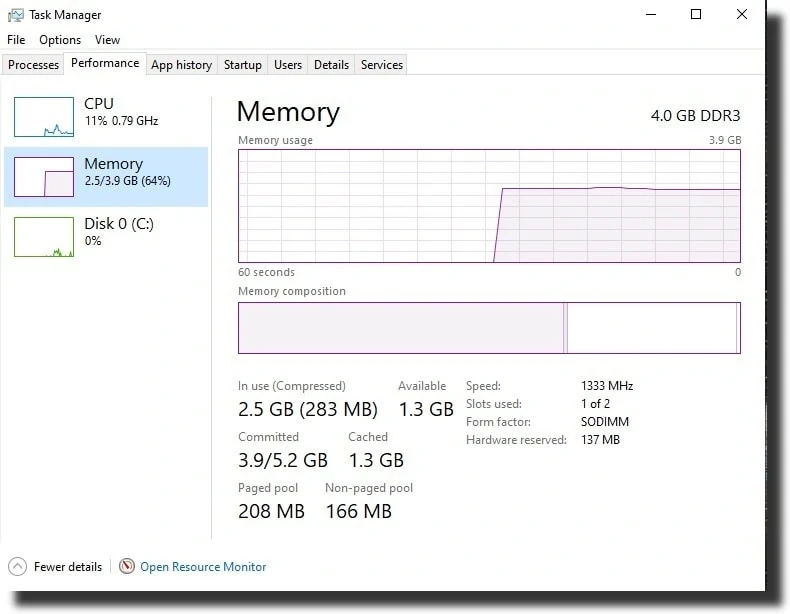
To get more information, click on the Performance tab. Clicking on the Memory section will give you a chart of your RAM usage over time.
Click on Open Resource Monitor, it is located on the bottom-left of the window. Then click on the memory tab to get further details.
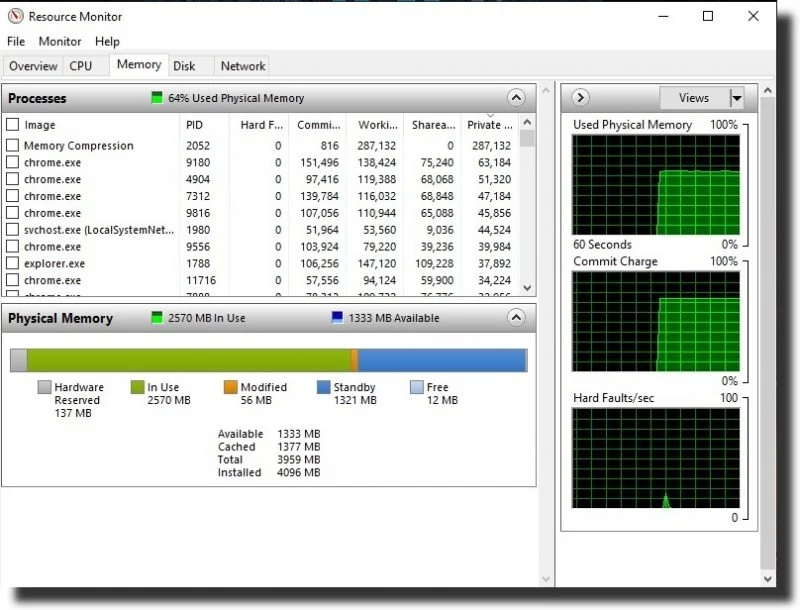
The chart at the bottom shows you how much free RAM you have left. Click on the Commit (KB) tab in the processes list so as to see which programs are using the most RAM.
An Alternative Tool is Process Hacker
Process Hacker is a powerful, multi-purpose tool that helps you to monitor system resources, detect malware, and debug software. It is basically an open-source Task Manager alternative that is loaded with advanced features. Get this if the Task Manager and Resource Monitor do not give you the system management functionality you need.
It comes with standard features like graphs for memory, CPU, and disk usage and gives you more control over all system processes. It also allows you to discover any process that might be using a particular file before you try to edit or delete it.
It also gives you the ability to create and manage your own system processes.
There are also other alternatives you can get like:
Uninstalling or Disabling Software
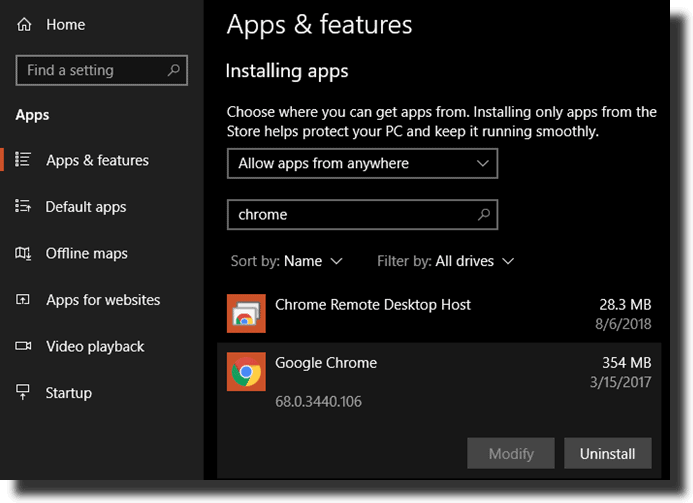
You’ve finally seen all the apps and processes that are using the most RAM on your system, now you have to think about whether you actually make use of them. One easy way of freeing up your RAM is to ensure that programs you do not make use of do not use any memory space.
Any app you have not used in a long time is wasting your RAM space if it uses it. This means you should either remove them or modify their settings.
You can do this by going to Settings, then clicking on Apps. Select the app you wish to delete or modify and the uninstall and modify options come up.
If you wish not to uninstall an app because you use it sometimes or might need it in the future, then you can prevent it from running at startup. This is because a lot of apps automatically set themselves to run every time you switch on your computer.
To do this you will need to go to the Windows startup folder. There are two startup folders for every PC; the personal startup folder for your account and the one for every user on the computer. Open a File Explorer window and enter “shell:startup“ to access your personal startup folder or “shell:common startup” to access the startup folder for every user.
Remove any program that you do not want to run at startup by deleting its shortcut icon.
Make Use of Lighter Apps and Manage Programs
If you really need to reduce the RAM usage and some apps are clogging it up. This is easily resolved in two ways.
Firstly, use lighter app alternatives as much as you can. For example, if your computer slows down when you have Photoshop open, then try using a lighter app like Paint or GIMP for minor work. Only use Photoshop for serious work or projects.
Secondly, pay really close attention to the programs that are open at the moment and close any software that you are not currently working on. Bookmark open browser tabs, that you might want to read again and save your work on all other software that you are not using. Keeping a very tight leash on the open softwares will help free up your RAM.
Scan for Malware
It is good practice to scan for malware on your PC. Rogue software could be stealing resources from your computer and this will definitely use up the available RAM.
There are many anti-malware software out there such as Malwarebytes that can be used to scan for any PC infection.
Adjust Virtual Memory
Earlier in this article, the page file was mentioned. This is the storage device that acts like a virtual RAM. Once you see error messages alerting you to the fact that your system is low on memory, you can consider increasing this and hopefully, it will keep the PC performance stable.
To do this, search for and open the Control Panel on the Start menu. If need be, switch the category view in the top-right to small icons and then click on System. On the left side click on Advanced system settings, this will open a new window.
Go to the Advanced tab, click on the Settings button that is under the Performance section. Switch to the Advanced tab once more and click on the Change button in the Virtual memory section.
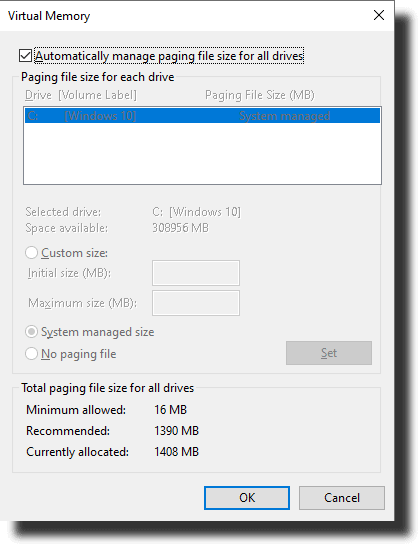
This will then show you the paging file size for the main drive. In most scenarios, you should be able to leave the Automatically manage paging file size box checked and Windows takes care of it. If however, you are running low on memory, you should uncheck this box and set the Initial size and Maximum size to higher values.
Try ReadyBoost
If your computer has an old mechanical hard disk drive (HDD) installed, you can consider trying a Windows feature that is not widely known called ReadyBoost in order to increase your RAM. This windows feature allows you to add additional memory without buying more RAM.
Ready Boost works in combination with a Windows feature called SuperFetch to store files on a flash device. This is done because flash devices are much quicker than a hard disk drive. Windows 7 and above allow for the use of multiple devices up to 256GB to be used for this.
To get this started with this, plug a compatible flash device into the PC. If AutoPlay comes up, then select the Speed up my system option. You can also click on Computer/This PC, right-click on the flash drive, select the Properties option, and then click on the ReadyBoost tab.
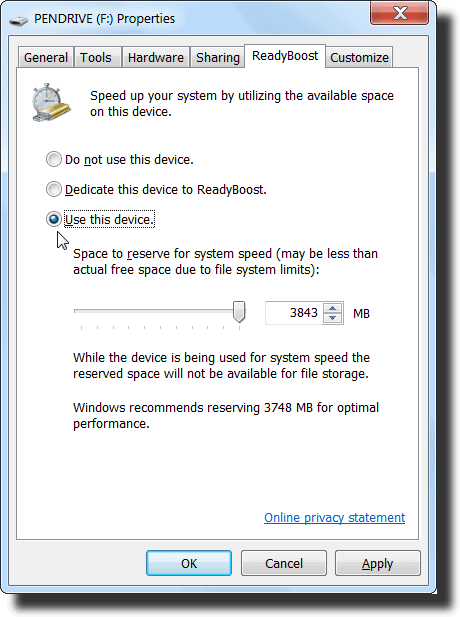
At this stage, you will be able to assign a specific amount of the space available to ReadyBoost. Windows will also recommend a certain amount which depends on the size of the drive. Click on the OK button and it’s set up, just make sure the flash drive is plugged in at all times you are using ReadyBoost.
ReadyBoost is accessible on every operating system from Windows Vista and above. However, It is only available for flash storage devices like SD cards, solid-state drives, and USB sticks. It only works if you are using an HDD and not an SSD as your primary storage device because it is slower than SSDs.
Also, because computers have more RAM these days by default, there is not much gain from ReadyBoost as there was in systems years ago. It does not offer up to the same performance gains as actually getting more RAM.
Install Additional RAM
If you need to run more programs at once and you are always running low on RAM, then you need to add more RAM to your system. While adding new RAM is not very cheap, it will give you much more improvement in the performance of your computer.
It is only possible to add more RAM by physically more RAM sticks into your PC. On a desktop, this is an easy upgrade, but on laptops, this becomes a bit difficult. You first need to check if your laptop has extra slots for RAM sticks or if it can work with a higher RAM, then you also need to make sure that the RAM stick you get is compatible with your system.
RAM Cleaners
You’ve most likely seen RAM cleaners or cleaning utilities all over the internet. These promise to boost your RAM performance in a lot of ways, but it is better to avoid them. These RAM cleaners work to free up RAM by taking it from other programs.
Then they take the RAM and apply it to a program or process of your choice. While this might sound ok, they may take the RAM from programs or processes that might actually need it on your system.
There are many RAM and system cleaners out there, we recommend CCleaner and System Mechanic.


")


