Windows 11 has some specific system requirements to be installed on any PC. Most users who can’t install or upgrade to Windows 11 lack the TPM module on their motherboard or CPU. Fortunately, you can still upgrade or install Windows 11 without TPM.
What is TPM?
A Trusted Platform Module, or TPM, is a protective layer for your computer. Its core function lies in enhancing the safety and integrity of your PC. Several services, such as the encryption service BitLocker Drive, and Windows Hello, rely on the TPM. It functions as a secure vault, generating and safeguarding cryptographic keys. Besides, it performs a critical verification process to ensure that your device’s operating system and firmware align with its original, untampered state.
Most of the time, TPM isn’t a part of the processor. Instead, it is usually a distinct chip on the motherboard. However, there’s a shift in this traditional model with the introduction of the TPM 2.0 standard. This new standard grants liberty to manufacturers such as Intel and AMD. It enables them to integrate the TPM function directly into their chipsets, eliminating the need for a separate chip.
Upgrade to Windows 11 without TPM
Before installing or upgrading to Windows 11, you should run the PC Health Check to see if you’re PC is eligible for the upgrade. If you currently run Windows 10, the app is installed by default on your system. If you lack TPM support, the app will let you know if you fulfill the minimum requirements.

There are several ways in which you can bypass the TPM check for installing Windows 11; we’ll focus on the 2 easiest.
Install Windows 11 with Rufus
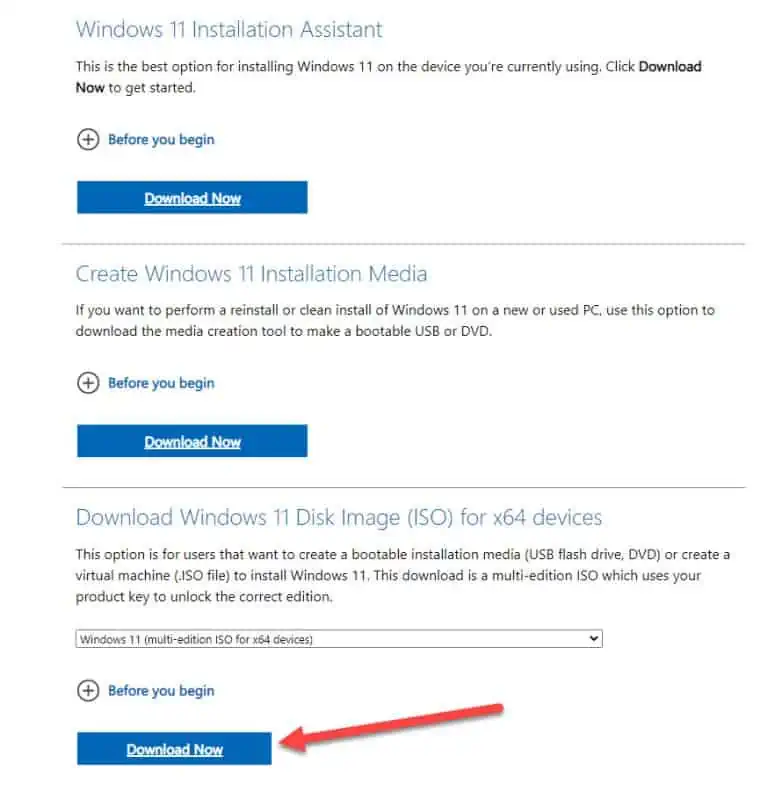
First, you must download the official Windows 11 image file from the Microsoft website.
Now, you have to download the latest version of Rufus. Insert your Flash Drive into the USB port and run Rufus. Once opened, select your USB flash drive and expand the dropdown menu to select Extended Windows 11 Installation (No TPM/no Secure Boot/8GB- RAM) option.
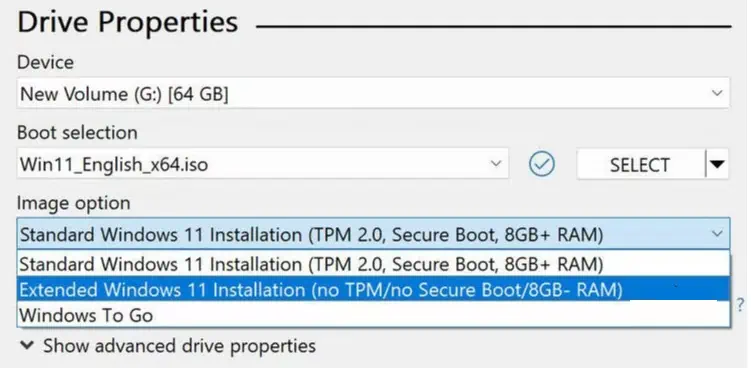
Now you’ll create a Windows 11 boot drive with no TPM that you’ll be able to install without problems on your PC.
Modify your registry with Regedit
This might confuse some users, but it’s pretty simple and effective. Using the search in your Windows, write “regedit” and you’ll find the regedit app or the Registry Editor. Alternatively, you can press WIN + R and write “regedit” without the quotes.
Once regedit is opened, you have to navigate to
HKEY_LOCAL_MACHINE\SYSTEM\Setup
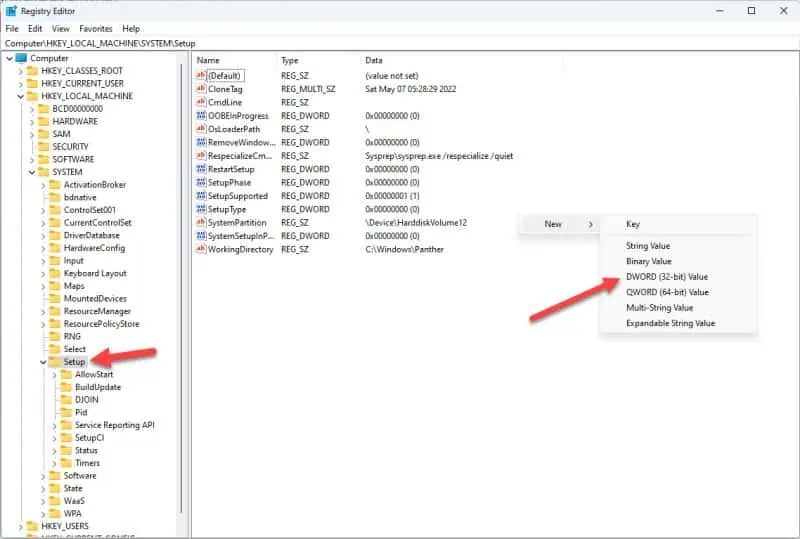
As you can see from the screenshot, once you get to Setup, you have to right-click on the right panel, New, and then choose DWORD (32-bit) Value.
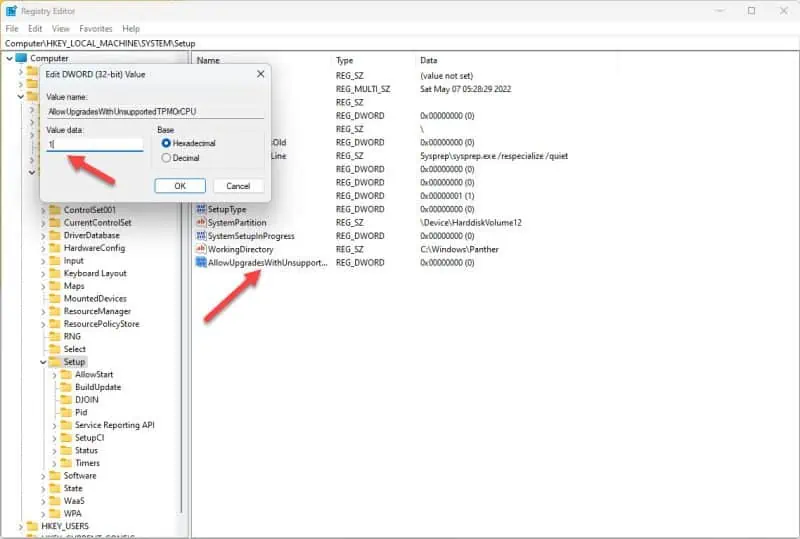
Set its name as AllowUpgradesWithUnsupportedTPMOrCPU and change its Value data field to 1.
Press OK to save the changes. Close Regedit and restart your PC.
Voila, you have successfully disabled the TPM support in the Windows registry, and you can safely upgrade your Windows 10 to 11.


")


