Diablo 4, the latest chapter in the celebrated Diablo series, embodies the essence of an action role-playing game crafted by the talented developers at Blizzard Entertainment. The company has diligently worked to bring this much-awaited fourth installment to life. The gaming community caught its first glimpse of Diablo 4 during BlizzCon 2019, where the announcement sparked excitement among fans. We’ll touch on every major aspect of the game in this Diablo 4 guide.
The official launch date is marked on the calendar for June 6, 2023. However, those eager who can’t wait that long can get the Early Access pack. Early Access begins on June 1st, allowing them to dive into the game’s rich and immersive world a few days earlier.
Diablo 4 is a massive open-world ARPG that has retained the best elements that always defined the Diablo series: distinct classes to play, engaging dungeons that invite exploration, and an epic storyline that keeps players hooked.
In this complete Diablo 4 guide, we’ll cover everything from classes, crafting, itemization, and stats to class builds, farming guides, and gameplay tips.
Builds
We know that some of you consumed a lot of Diablo 4 guides waiting for the game to launch. We decided to add this section first since our analytics show an increasing demand for leveling builds or builds in general. That being said, we’re still working on builds as we speak, and we’ll update this section as we add them to the site. Bookmark it!
Leveling Builds
- Sorcerer Leveling Builds
- Rogue Leveling Builds
- Barbarian Leveling Builds
- Necromancer Leveling Builds
- Druid Leveling Builds
Classes
We’ll start our Diablo 4 guide with its five classes: Barbarian, Sorcerer, Rogue, Necromancer, and Druid. The game will get additional classes via seasons or expansion packs during its lifecycle as an online service.
Barbarian
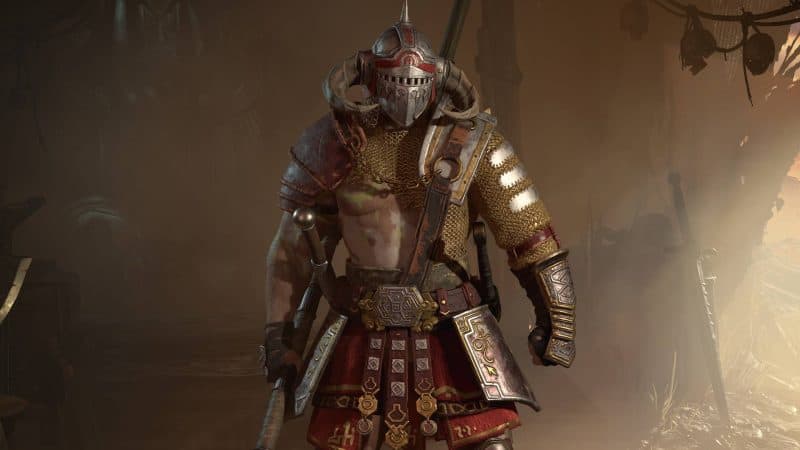
The Barbarian puts you in the thick of the action, primed for close-quarters combat. The class can wield 1-hand and 2-hander weapons, making it a versatile melee fighter. As a resource, the Barbarian uses Fury as its Diablo 3 counterpart. Fury is capped at 100 and can be generated via resource generators known as Basic Skills, with item passives and Paragon nodes. The Barbarian also relies on Strength as its primary attribute and it gains x0.1% Skill Damage per point of Strength.
Unique Barbarian mechanic
The main unique feature of the Barbarian is the Arsenal System, which you can use once you hit level 5. This system lets the Barbarian carry four weapons simultaneously and match certain weapons with certain skills. That means the Barbarian will automatically switch to the right weapon when you use a skill.
The Arsenal System also helps the Barbarians get better with various weapons by using them in battle. Every weapon class begins at expertise level 1 and has a special bonus that improves with each level. You even unlock a bonus effect when you hit the top expertise level of 10.
If you’re interested in Barb builds, here are the best Barbarian leveling builds in Diablo 4, to kickstart your journey.
Sorcerer

The Sorcerer is a ranged caster class that uses Mana as a resource, has excellent crowd control options, and uses fire, cold or lightning spells to destroy its enemies. Sorcerers depend on Mana as their main resource. It’s a type of magical power they consume to perform their skills.
Mana regenerates over time, which helps refill your Mana reserve after fights or using specific skills. You can speed up mana regeneration by choosing certain passives, finding items that give you a % mana return, or choosing specific Paragon nodes. The main stat used by the Sorcerer is Intelligence which can be gained by leveling, itemization, and Paragon nodes. The Sorcerer gains x0.1% Skill Damage per point of Intelligence.
Unique Sorcerer mechanic
Diablo 4 Sorcerers have a unique feature called the Enchantment System, represented by Enchantment Slots. This system lets players add extra effects to their chosen skills, giving the Sorcerer class many choices and ways to diversify their builds.
There are two Enchantment Slots to unlock, each at a different level. The first slot opens up when you hit Level 15 after you finish a special class quest. The second slot opens up when you reach Level 30. Every skill that’s not an ultimate has a specific Enchantment effect, and you can fit any non-ultimate skill into the two Enchantment Slots.
If you’re looking for the best builds, check out our best Sorcerer leveling builds in Diablo 4.
Rogue

The Rogue is a fighter class who can strike from far away or up close, dual-wielding 1-handed melee weapons and ranged weapons such as bows or crossbows. This class is extremely agile and has an arsenal of traps and abilities to defeat its foes. Rogues can also enhance their weapons with Ice, Poison, or Shadow coatings for extra effects and damage.
Rogues use Energy as their primary resource. Energy naturally fills up slowly, but certain effects linked to skills, talents, equipment or Paragon boards can speed up this process. Rogues use Dexterity as their primary stat, enhancing their ability damage and crit chance. The Rogue gains x0.1% Skill Damage per point of Dexterity.
Unique Rogue mechanic
The Rogue has a unique class mechanic known as Specializations. Players can use these Specializations once they reach level 15 and complete a rogue-specific questline. There are a total of 3 Specializations for the Rogue: Combo Points, Inner Sight, and Preparation. The Rogue can only choose one specialization at a time, but you can freely swap specializations in combat.
The Rogue is a decently difficult class to master if you’re looking for leveling builds, here are the best Rogue leveling builds in Diablo 4.
Necromancer

The Necromancer is a caster class that specializes in dark magic and summons. They can control armies of skeletons and golems to dominate the battlefield. The Necromancer specializes in Blood, Bone, and Shadow magic, manipulating corpses and blood to debuff or destroy its enemies.
Essence is the Necromancer’s primary resource used for most abilities. Essence regenerates over time, and its rate can be further enhanced via skills, passives, items and of course, the Paragon boards. Like the Sorcerer, the Necromancer uses Intelligence as its primary stat and gains x0.1% Skill Damage per point.
Unique Necromancer mechanic
The Necromancer has a unique mechanic called The Book of the Dead. This specialization allows the Necromancer to manipulate its undead army to its liking. You can choose what types of skeletons or golems you want to have beside you or you can choose to sacrifice them for a certain boost or effect.
If you want to check out some interesting Necromancer starter builds, we recommend our best Necromancer leveling builds guide.
Druid

The Druid is a shape-shifting class that can change its form whenever they want. As main elements, Druids use Earth and Storm abilities to defeat their enemies. Similar to the Barbarian and its weapons, various druid skills require different forms.
The Druid class uses Spirit as their primary resource. Spirit for Druids is soft-capped at 100. Unlike Mana or Energy, Spirit does not regen over time. However, you can gain Spirit by using basic skills and certain abilities. Unlike all the other classes, Druids use Willpower as their primary attribute. Each point into Willpower increases damage dealt by 0.01% and Healing Received by 0.1% per point.
Unique Druid mechanic
The Druid’s unique specialization is called Spirit Boons. It lets you pick a boost from each of the four spirits, Deer, Eagle, Wolf, and Snake. When you get to level 15, monsters begin to drop Druidic Spirit Offerings. You use these to unlock the 12 Boons. Take them to Túr Dúlra to win the spirits’ approval.
If you want to check out some good Druid builds, we crafted and tested 3 Druid leveling builds that will surely make the leveling process faster and more enjoyable.
Itemization
Diablo 4, being a complex ARPG, comes with multiple layers of itemization and different currencies. You can get items by killing monsters, completing events and quests, gambling with Obols or crafting, to name a few. It’s also worth noting that you can target specific gear types, by killing specific mobs in certain areas. It sounds complicated, but it really isn’t.
Gear
As mentioned earlier, you can get gear by doing different activities and, evidently, by killing monsters. Each gear slot can have different rarities:
- Common – no affixes
- Magic – Comes with 1 affix
- Rare – Can have up to five affixes (depending on the World Tier)
- Legendary – Comes with 4 affixes and 1 legendary affix
- Unique – These contain a fixed number of affixes, cannot be altered, and are usually tailored for a specific class.
Every character, except Barbarians and Rogues, has 10 gear slots. Barbarians, due to their Arsenal System, have a total of 11 gear slots. Rogues, dual-wielding melee weapons, and wearing a bow/crossbow, get 11 slots as well. Players can always wear five pieces of armor and three pieces of jewelry, which include one amulet and two rings.
Stats
In Diablo 4, your character has many stats, each serving a unique purpose in your journey. These stats form the lifeblood of your character, influencing how effectively you navigate the challenges that come your way.
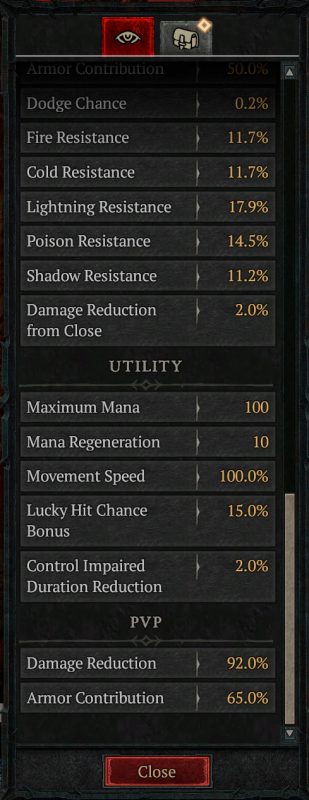
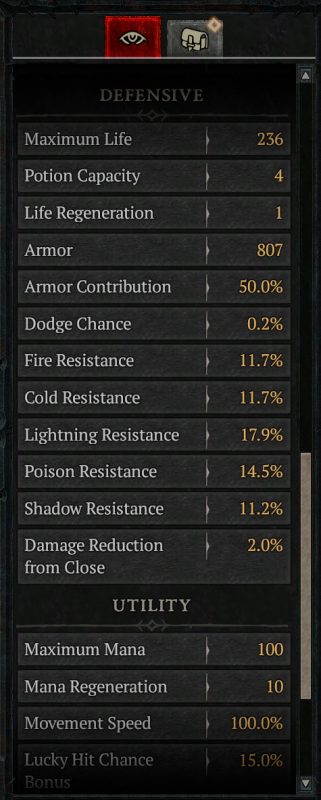
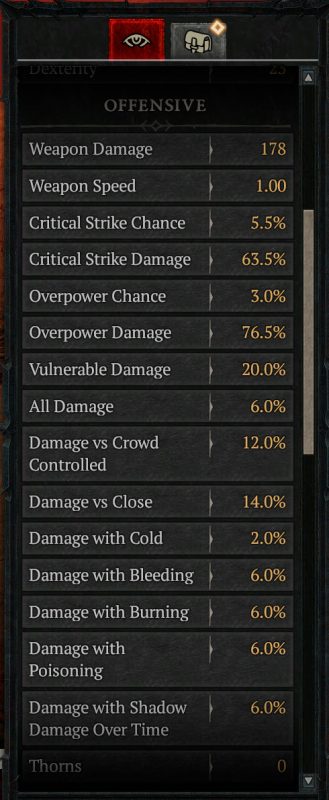
There are four types of stats in Diablo 4: Core stats, Offensive, Defensive, and Utility.
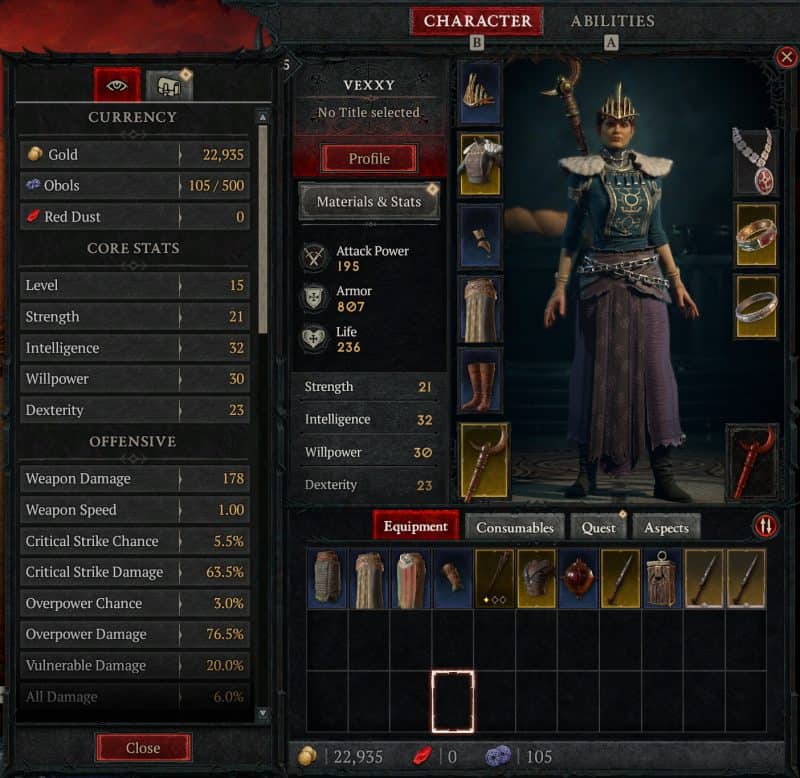
- Core Stats – These are the main stats of your character, and there are four in-game: Strength, Intelligence, Dexterity, and Willpower.
- Offensive – Weapon Damage, Weapon Speed, Critical Strike Chance, Overpower Chance, Overpower Damage, Vulnerable Damage, All Damage, Damage to Close Enemies, Damage to Distant Enemies, etc
- Defensive – Max Life, Armor, Damage Reduction, Resistances, Dodge Chance, Fortify, Healing Received, and so on
- Utility – Lucky Hit Chance, Cooldown Reduction, Resource Cost Reduction, Movement Speed, Thorns, etc
Core Stats always give you these bonuses, no matter your class.
- Strength: +1 Armor per point
- Intelligence: +0.05% All Resistance per point
- Willpower: +0.1% Healing Received and +0.25% Overpower Damage per point
- Dexterity: +0.025% Dodge Chance per point
As we pointed out in the class overview, each class benefits more from its main stat. If you want to dive further into stats, we recommend checking out our Diablo 4 Stats Guide.
Legendary Aspects
In Diablo IV, there’s an incredibly powerful feature known as ‘Extracting Aspects.’ What this essentially does is it allows the players to extract the passive effects of any Legendary item. After these effects have been extracted, players apply them to any rare item they wish. This way, they can customize their gear to suit their preferred build. Since Legendary items come only with 4 affixes, it’s preferred to hunt for a good Rare item and then Imprint it with the desired Legendary affix we extracted.
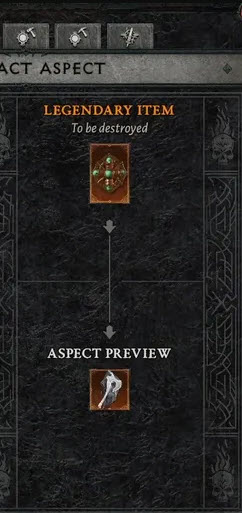
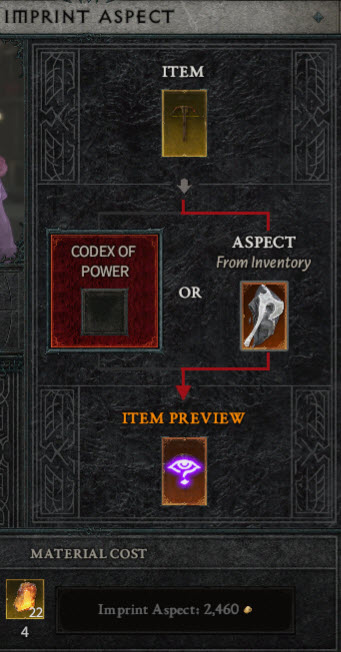
Diablo 4 presents a fascinating nuance when it comes to Aspects and their imprinting on Rare or Legendary Items. It’s not a one-size-fits-all situation, as not every Aspect can be imprinted on any given item. In fact, the Aspects are meticulously divided into various categories, with each category determining the possible slots it can imprint on.
This adds an added layer of strategic thought and planning to the gameplay. It lets the players plan more profoundly about their build. It also discourages players from the oversimplified approach of stacking every available damage multiplier onto all their items.
- Offensive: Gloves, 1H Weapon, 2H Weapon (+100% Effectiveness), Ring, Amulet (+50% Effectiveness)
- Defensive: Helm, Chest, Pants, Amulet (+50% Effectiveness)
- Resource: Helm, Ring, Amulet (+50% Effectiveness)
- Utility: Helm, Chest, Boots, Gloves, Amulet (+50% Effectiveness)
- Mobility: Boots, Amulet (+50% Effectiveness)
As you can see, imprinting legendary aspects on 2H weapons, for example, gives you a 2x increase effect, while imprinting on your amulet grants a 1.5x increase. This is extremely important since imprinting your build-specific aspect into the amulet or 2H weapon for maximum benefit is better.
Upgrading and Enchanting
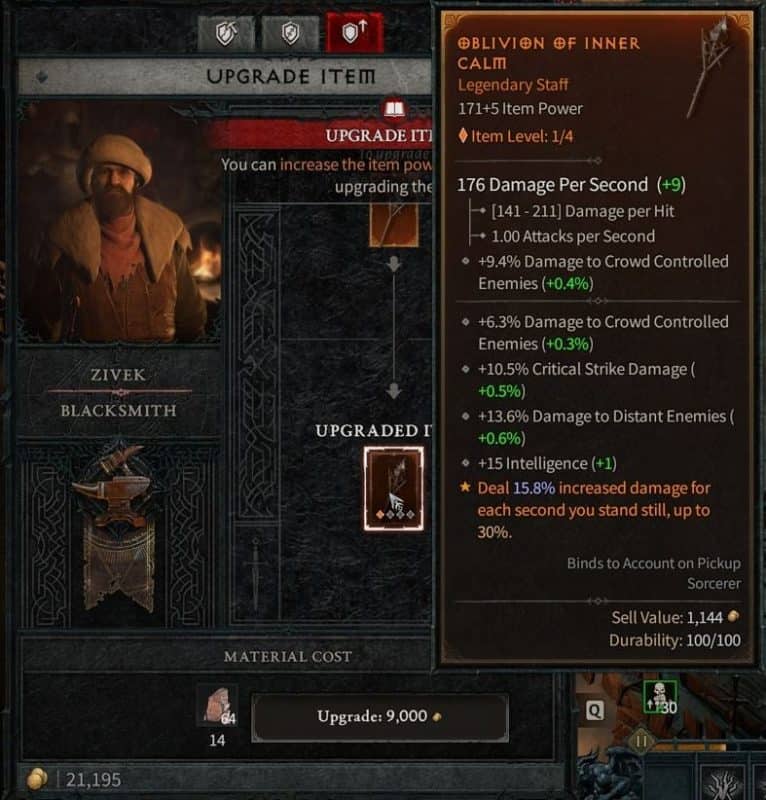
In Diablo 4, players can boost the power of their gear, increasing the power of their items. They can take their gear to two specialized locations – the Blacksmith and the Jeweler – for these vital enhancements. Once there, they can increase both the Item Power and the range of stats of the upgraded item.
The player can upgrade any item up to 5 times. This limit depends on the rarity of the gear. As you might expect, the higher the rarity, the more enhancements it can accommodate.
Regarding the cost of these upgrades, players must shell out some of their hard-earned Gold and Materials. It’s crucial to note that the cost isn’t static – it increases each time a piece is upgraded.
But the benefits make it well worth it. For each upgrade successfully applied to a piece of equipment, characters will enjoy an impressive increase in Item Power – specifically, a boost of +5 per upgrade.
- The Blacksmith – lets the player repair, salvage, or upgrade items.
- The Jeweler – allows the player to upgrade gems and socket their gear.
- The Occultist – lets the player extract and apply any legendary aspect.
Gems
Gems in Diablo 4 come in a variety of types, and each one is unique, offering distinct advantages. The diversity doesn’t end there, though, because each Gem’s bonus can change based on where it’s placed. These Gems can be socketed into different pieces of equipment – Armor, Jewelry, or Weapon, and the bonus changes according to the placement.
These bonuses aren’t static either; the quality of the Gem directly influences them. The better the Gem quality, the more substantial the bonus. This adds another layer of diversity, as players must collect and upgrade gems to increase their bonuses.
In this Diablo 4 guide, you can check out all the gems and their bonuses per slot and tier.
 Amethyst Gems
| Amethyst | Crude | Chipped | Gem | Flawless | Royal | T6 | T7 | T8 | |||
| Weapon | % Damage Over Time | 4% | 5% | 6% | 7% | 8% | 9% | 10% | 11% | ||
| Armor | % Damage Taken Over Time Reduction | 4.0% | 5.0% | 6.0% | 7.0% | 8.0% | 9.0% | 10.0% | 11.0% | ||
| Jewelry | % Shadow Resistance | 11.5% | 14.3% | 17.1% | 19.9% | 22.7% | 25.5% | 28.3% | 31.1% | ||
 Diamond Gems
| Diamond | Crude | Chipped | Gem | Flawless | Royal | T6 | T7 | T8 | |||
| Weapon | % Ultimate damage | 7% | 9% | 11.0% | 13.0% | 15.0% | 17.0% | 19.0% | 21.0% | ||
| Armor | % Barrier Generation | 3% | 4% | 4.0% | 4.5% | 5.0% | 5.5% | 6.0% | 6.5% | ||
| Jewelry | % Resistance to All Elements | 4% | 5% | 6.0% | 7.0% | 8.0% | 9.0% | 10.0% | 11.0% | ||
 Emerald Gems
| Emerald | Crude | Chipped | Gem | Flawless | Royal | T6 | T7 | T8 | |||
| Weapon | % Critical Strike Damage to Vulnerable Enemies | 6% | 7.5% | 9.0% | 10.5% | 12.0% | 13.5% | 15.0% | 16.5% | ||
| Armor | +Thorns | 12 | 28 | 44 | 60 | 76 | 92 | 108 | 124 | ||
| Jewelry | % Poison Resistance | 11.5% | 14.3% | 17.1% | 19.9% | 22.7% | 25.5% | 28.3% | 31.1% | ||
 Ruby Gems
| Ruby | Crude | Chipped | Gem | Flawless | Royal | T6 | T7 | T8 | |||
| Weapon | % Overpower Damage | 12% | 15% | 18.0% | 21.0% | 24.0% | 27.0% | 30.0% | 33.0% | ||
| Armor | +% Life | 2% | 2.5% | 3.0% | 3.5% | 4.0% | 4.5% | 5.0% | 5.5% | ||
| Jewelry | % Fire Resistance | 11.5% | 14.3% | 17.1% | 19.9% | 22.7% | 25.5% | 28.3% | 31.1% | ||
 Sapphire Gems
| Sapphire | Crude | Chipped | Gem | Flawless | Royal | T6 | T7 | T8 | |||
| Weapon | % Critical Strike Damage to Crowd-Controlled Enemies | 6% | 7.5% | 9.0% | 10.5% | 12.0% | 13.5% | 15.0% | 16.5% | ||
| Armor | % Damage Reduction While Fortified | 1.0% | 1.5% | 2.0% | 2.5% | 3.0% | 3.5% | 4.0% | 4.5% | ||
| Jewelry | % Cold Resistance | 11.5% | 14.3% | 17.1% | 19.9% | 22.7% | 25.5% | 28.3% | 31.1% | ||
 Topaz Gems
| Topaz | Crude | Chipped | Gem | Flawless | Royal | T6 | T7 | T8 | |||
| Weapon | % Basic Skill Damage | 10.0% | 12.5% | 15.0% | 17.5% | 20.0% | 22.5% | 25.0% | 27.5% | ||
| Armor | % Damage Reduction While Control Impaired | 6.6% | 7.0% | 7.4% | 7.8% | 8.2% | 8.6% | 9.0% | 9.4% | ||
| Jewelry | % Lightning Resistance | 11.5% | 14.3% | 17.1% | 19.9% | 22.7% | 25.5% | 28.3% | 31.1% | ||
 Skull Gems
| Skull | Crude | Chipped | Gem | Flawless | Royal | T6 | T7 | T8 | |||
| Weapon | Life On Kill | 2 | 5 | 8 | 11 | 14 | 17 | 20 | 23 | ||
| Armor | Healing Received | 3.0% | 3.5% | 4.0% | 4.5% | 5.0% | 5.5% | 6.0% | 6.5% | ||
| Jewelry | Armor | 100 | 125 | 150 | 175 | 200 | 225 | 250 | 275 | ||
Runes
In Diablo 4, Runes hold a unique and significant role in the gameplay. These are distinctive items that you can skillfully insert into weapons and armor pieces, but only those that come equipped with special sockets.
To add a layer of strategy and variety to the process, Runes are divided into two distinct categories – Condition Runes and Effect Runes. Each type of Rune has a different function, and knowing how to use them effectively can significantly enhance your output.
The real magic happens when these Runes are combined. Together, they can form what is known as Rune Words, granting additional, potent effects to your gear. This adds another exciting element to the mix, allowing players to experiment with different combinations, unlocking powerful benefits that can give them the upper hand in the game.
Currency
Diablo 4 is a world teeming with various currency items, painting a vibrant and complex economic landscape for players to navigate. You’ll find everything from the familiar Gold to Runes, Premium Currency, Obols, Red Dust, Cinders, and Shards of Hatred.
Gold
Gold takes center stage as the primary currency of Diablo 4. Whether you want to get a vendor item or repair your battle-worn equipment, the costs are typically represented in Gold. It’s deeply rooted in most aspects of the game. That’s why players must amass as much Gold as they possibly can! You can get gold from monsters and chests, completing events and quests.
Since Gold is probably the most important currency in the game, at least at early levels, it’s better to understand why we don’t need to overspend.
- Players need gold to respec or change their builds. While the gold costs in the start are minimal, the more you respec your skill tree and paragon boards, the more gold you will spend.
- Upgrading items cost gold and materials. Again, gold is needed here as well.
- Repairing your equipment
- Extracting and applying legendary aspects
- Trading
Murmuring Obols
Murmuring Obols are acquired specifically through the successful completion of Events. It’s an exciting way to boost your resources while engaging in thrilling tasks and challenges in the Open World or Dungeons.
With Murmuring Obols, you can take a chance and gamble this currency for gear at the Purveyor of Curiosities. This character offers gear that might just be what you need to give your character that extra edge. The real icing is that this process is not just about gear acquisition. It’s also an excellent source of Legendary Powers.
Seeds of Hatred and Red Dust
Diablo 4 has a PVP-only zone named Fields of Hatred. In the zone, every player is flagged for PVP and can attack and be attacked by other players. Farming in this area grants the player Seeds of Hatred, which can be lost if killed by another player. However, once you get to an Altar of Extraction, you can convert all your Seeds of Hatred into Red Dust.
Red Dust cannot be dropped on death and can be used as a currency for cosmetic-only items and mounts from the Fields of Hatred.
Cinders
Diablo 4 features Helltide events in which players need to fight empowered monsters sent by Lilith to destroy the land. During these events, monsters drop Cinders, which can be used to open Helltide Chests. This is one of the few ways you can target specific gear types (boots, chest, etc). It’s also worth noting that upon death, you’ll drop your collected Cinders, and you need to reclaim them.
Premium Currency
The Premium Currency is used only in the game’s Shop to purchase cosmetic-only items. You can also unlock Battlepass levels by spending this currency as well.
Paragon System
The Diablo 4 Paragon system extends your character and skill choices, boosting your character even more.
Reaching level 50 in Diablo IV unveils an exciting milestone in your gameplay – unlocking the Paragon Boards. This new feature adds an exciting depth to your character’s progression, allowing you to enhance further and specialize your abilities.
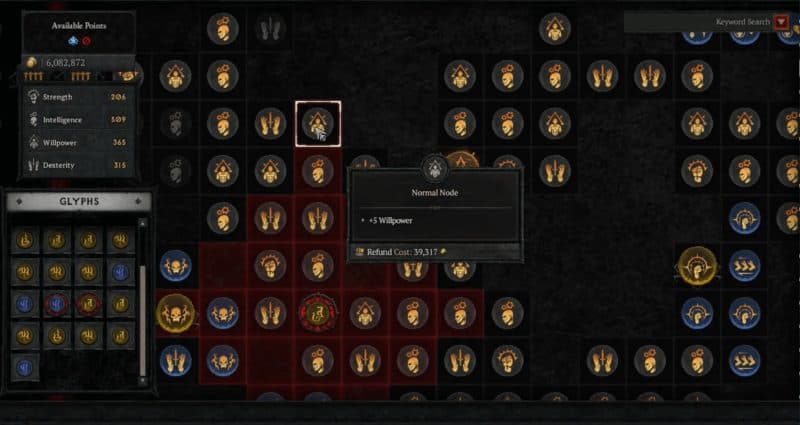
The mechanics are straightforward but exciting. With each level gained beyond 50, you are awarded 4 Paragon points. Interestingly, you don’t have to fully level up to earn a point – every 25% of a level also awards you a point, adding a sense of steady progression to your gameplay.
However, it’s important to note that the Paragon Board isn’t an infinite playground. It reaches its cap once your character gets to level 100. By that point, you’ll have amassed a total of 220 Paragon points to distribute and utilize. 200 points come from leveling up, while the remaining 20 are gained through the Renown system.
As you venture forth in Diablo IV, remember that reaching level 50 is the beginning of a new chapter in your adventure. If you want to learn more about the Paragon system, check out our Paragon Board guide (soon).
Renown System
In Diablo 4, the Renown system is a crucial mechanic for the progression of your characters. It measures your reputation across various Sanctuary zones and is subdivided into five stages. As you climb the ladder of Renown, you are granted benefits that significantly enhance your gameplay. This includes rewards such as Gold, and extra Skill Points, which allow you to augment your character’s abilities.
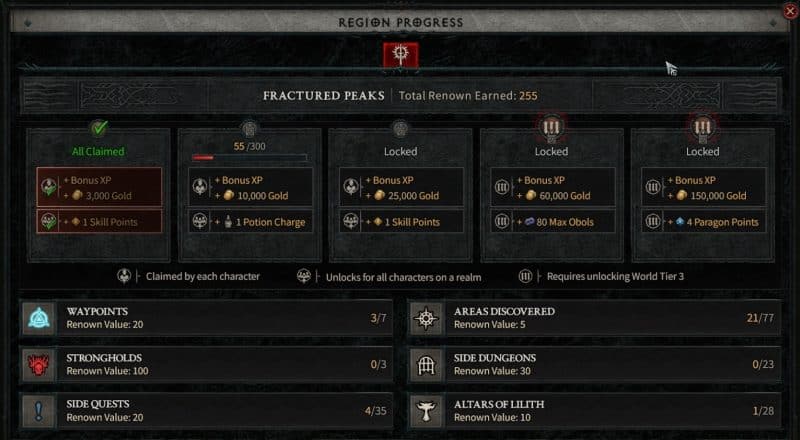
Additionally, you’re granted more Potion Charges for vital health recovery during battles, increased capacity for Murmuring Obols, and valuable Paragon Points, all aiding you in your journey through the lands of Diablo 4.
Each primary Zone boasts its own individual Renown track. Upon reaching specific milestones on this track, your accumulated points will trigger the unlocking of various rewards. These incentives are categorized into five stages, encompassing rewards applicable to your entire account and those specifically tied to individual characters.
Renown points are gained as follows:
- Areas discovered +5 Renown
- Altars of Lilith +10 Renown
- Waypoints +20 Renown
- Side quests +20 Renown
- Side dungeons +30 Renown
- Strongholds +100 Renown
The pathway to unlocking the last two stages is gated behind the achievement of the 3rd world tier. Once this significant feat is accomplished, you are granted access to these advanced stages, providing even greater rewards and enhancing your character’s journey through the expansive world of Diablo 4.
Crafting
A Diablo 4 guide wouldn’t be complete if we didn’t touch the crafting aspect of the game. In Diablo 4, crafting involves around extracting Legendary Aspects and finding the best Rare item to imprint. While this may sound confusing for some, remember that, as mentioned earlier, Rare items can have up to 5 affixes, and Legendary items have just 4. That means you can effectively extract the legendary power and imprint it on your desired rare item. That’s where crafting comes into play!
The Occultist
The path to crafting your ideal gear in Diablo 4 starts with a crucial milestone – gaining access to the Occultist. To achieve this, you have a couple of routes at your disposal. You can level up your character to 25 or successfully clear any dungeon.
Upon accomplishing either of these tasks, you’ll be rewarded with an invaluable resource – the Codex of Power. This comprehensive tome is brimming with various legendary aspects that you can strategically imprint into your gear. However, there’s a catch. The legendary aspects in the Codex come with a slight downside as they always carry the lowest possible stat rolls.
When you aim to create the perfect item, these lower stats might not quite cut it. What you’ll want to do instead is to set your sights on discovering legendaries that boast higher stat rolls. As you journey through Sanctuary, keep your eyes peeled for these superior legendaries.
Once you find a good Legendary item, you Extract its Aspect at the Occultist. Now all you have to do is to find a good Rare item for the imprint. Even if you don’t have a max-rolled Rare item, the Occultist can help by rerolling a stat from that Rare item to bring it closer to your desired value.
The Jeweler
After you get your desired item, the Jeweler can help you socket the item. You can slot any gems you want into the respective item by socketing. Visit our Gems section to see each type of gem, and it’s bonuses per gear slot.
The Blacksmith
Known by its repair skills, the Blacksmith can also aid you in upgrading any piece of gear you want. Each piece can be upgraded up to 4 times, each time adding a +5 value to your item power. The Blacksmith can also salvage any gear you carry for crafting materials, which you will use for upgrading your gear.
End Game Farming
It’s no secret that in all ARPGs, the game starts in the end game. Sure, it’s fun to level and do the story quests and discover the world, but in the end, these types of games are defined by their endless grind for the perfect items. Fortunately, the game offers various endgame activities, which we’ll touch on in this Diablo 4 guide.
Nightmare Dungeons
The Nightmare Dungeons are the tougher versions of regular dungeons. The layouts are the same, but the mobs are more powerful, and the dungeons gain specific affixes that will alter the gameplay in that specific dungeon. They ramp up the difficulty level, calling on players to bring their A-game as they try to clear them out. But it’s not all about the heightened challenge – these dungeons also up the ante regarding rewards, promising greater spoils for those brave enough to take them on.
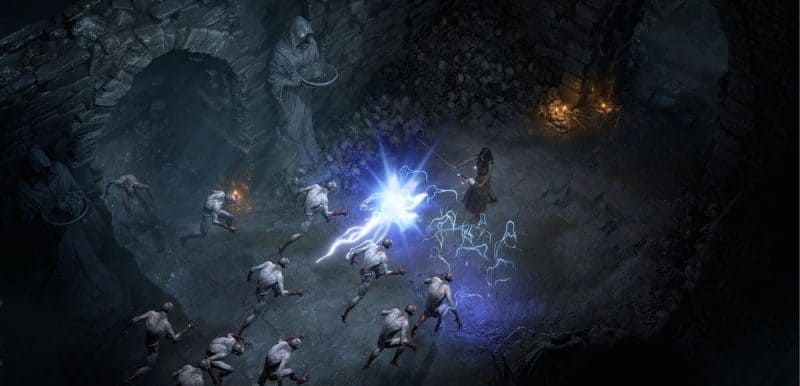
Each normal dungeon can be upgraded to Nightmare using Nightmare Sigils. These sigils modify the dungeon by adding affixes and making the mobs stronger. For example, one such sigil can increase monsters’ attack speed, their elemental resistances, and Vulnerable damage taken. Nightmare Sigils can also add specific events to the dungeon, increasing the difficulty. However, you only have 12 attempts at a Nightmare Dungeon, and if you die 12 times, you’ll completely lose your chance to clear it.
All the loot that drops in Nightmare Dungeons is exponentially better than their standard counterparts – it’s basically the end-game loot we’re looking for. It’s safe to say Nightmare Dungeons are the primary end-game activity in Diablo 4.
Helltide Areas
The zones known as Helltides present a heightened level of difficulty and an expansive open-world environment within the confines of Sanctuary. Venturing into these areas yields valuable currency, known as Cinders, used to open Helltide Chests within the region. However, access to these challenging zones is only granted to players who have completed the Diablo 4 campaign.
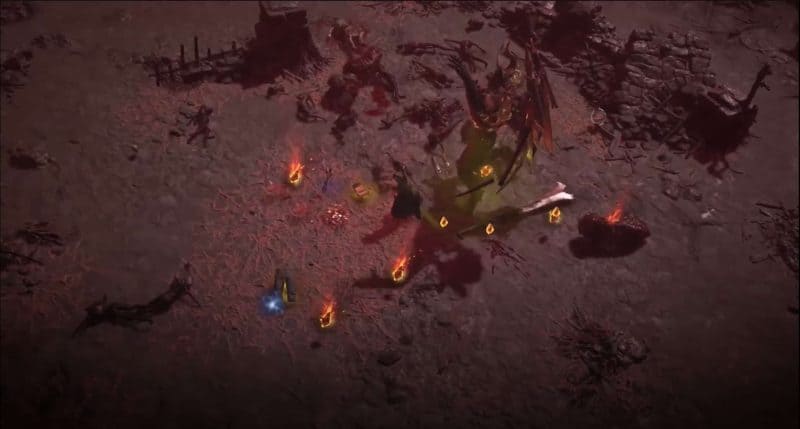
A formidable presence of Hell’s forces permeates the Helltide areas, presenting players with adversaries of considerable strength. Adding to the atmospheric tension, the skies take on a foreboding shade of darkness while rivers adopt a horrifyingly crimson hue, appearing as though they’re filled with blood. All the while, meteors sporadically fall from the skies, creating an environment that is as challenging as it is exciting.
Tree of Whispers
The enigmatic entity known as the Tree of Whispers extends an intriguing opportunity through the Whispers of the Dead – a series of bounties designed for players to accomplish. Completing these tasks grants players bountiful reward caches for that extra loot.

The nature of these tasks tends to be quite straightforward, perfectly suited for that change of pace. As you gather the necessary items or fulfill the predefined objective, your path will again lead you back to the ethereal Tree of Whispers, where you will conclude the Whispers of the Dead bounty.
Undoubtedly, one of the most thrilling aspects of this experience is the chance to select from an array of reward boxes. This flexibility allows you to better tailor and direct your pursuit for loot, allowing for a more efficient and focused progression.
Fields of Hatred
Fields of Hatred is the primary engagement area for players seeking a PvP-oriented endgame experience within Diablo 4. This gameplay mode, characterized by its extraction-based mechanics, is a strategic battlefield where players can test their combat skills.
The currency associated with the Field of Hatred are the Seeds of Hatred. These seeds can be farmed in the region but can be lost if you die within the Field of Hatred.
If you reach an Altar of Extraction, you can convert the Seeds of Hatred into Red Dust, used to purchase cosmetic-only gear.
World Bosses
Across Sanctuary’s vast and expansive open world, formidable world bosses, each posing different levels of challenge, will emerge at different locations. Any player with the courage and skill to confront and defeat these mighty foes will be generously rewarded for their bravery and prowess.
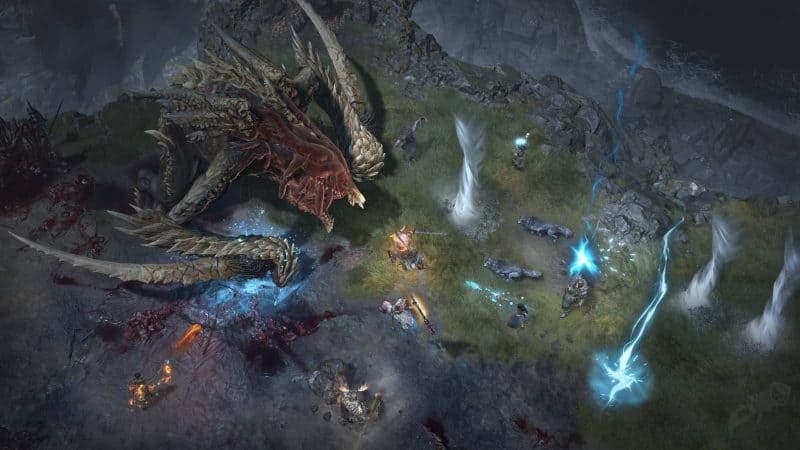
The encounters with world bosses in Diablo 4 involve a progression through multiple stages, each escalating in difficulty and intensity. Every boss carries a specific monster level that defines the level of challenge they present, and this difficulty level dynamically scales as you delve deeper into the sequential stages of the battle. Moreover, these formidable adversaries possess distinct vulnerabilities and varying shield levels that add a layer of strategic complexity to the combat. Consequently, you might find yourself compelled to rethink and modify your character builds within the endgame of Diablo 4, as you continually adapt to the ever-changing demands of these grueling battles.
World bosses have a set respawn timer, and they offer weekly rewards. Here are some world bosses that you must challenge in your journey: Andariel, Blood Bishop, Drowned Witch, Duriel, Tomb Lord, Skeleton Lord, Ashava, and Lilith.
As you can see in our Diablo 4 guide, the game offers a large variety of end-game activities for every type of player. Combine this with the robust itemization system, excellent combat mechanics, and all the other systems – you surely have a winning recipe.


